找到
24
篇与
开源工具
相关的结果
-
 Wireshark 是什么?好用的工具软件推荐 推荐一个实用的开源工具——Wireshark。项目由Wireshark开发维护,采用未知开源协议发布。简单来说,它是一个,对于站长和开发者来说是个不错的工具。 工具功能介绍 介绍 {以下是码云平台说明,您可以替换此简介 码云是 OSCHINA 推出的基于 Git 的代码托管平台(同时支持 SVN)。专为开发者提供稳定、高效、安全的云端软件开发协作平台 无论是个人、团队、或是企业,都能够用码云实现代码托管、项目管理、协作开发。企业项目请看 https://gitee.com/enterprises} 软件架构 软件架构说明 安装教程 xxxx xxxx xxxx 使用说明 xxxx xxxx xxxx 参与贡献 Fork 本仓库 新建 Feat_xxx 分支 提交代码 新建 Pull Request 码云特技 使用 Readme\_XXX.md 来支持不同的语言,例如 Readme\_en.md, Readme\_zh.md 码云官方博客 blog.gitee.com 你可以 https://gitee.com/explore 这个地址来了解码云上的优秀开源项目 GVP 全称是码云最有价值开源项目,是码云综合评定出的优秀开源项目 码云官方提供的使用手册 https://gitee.com/help 码云封面人物是一档用来展示码云会员风采的栏目 https://gitee.com/gitee-stars/ 总的来说,Wireshark是一个功能比较实用的开源工具,适合日常工作和学习使用。如果你正在寻找一个的解决方案,不妨下载试试。使用前建议仔细阅读项目文档。 {card-default label="📦 工具信息"} 🔧 工具名称:Wireshark 👤 开发作者:Wireshark 📝 工具描述: 💻 开发语言:Java 📜 开源协议:未知开源协议 ⭐ Star数:0 | 🍴 Fork数:0 📅 更新时间:2020年12月19日 {/card-default} 本文介绍的工具来源于Gitee开源社区,仅供学习交流使用,请遵守原项目开源协议。
-
免费开源开源工具推荐:setool-master 下载 今天给大家分享一款实用的开源工具——setool-master。这个工具在Gitee上获得了3个Star,主要功能是SetoolMaster是一款让你入门即入狱的python3开发的进阶型社会工程学工具。包括了全球定位、Ngrok内网穿透、Seeker高精度定位、网页钓鱼、病毒攻击、恐吓勒索信、爬虫、网站克隆、物联网设备搜索等,同时拥有中文支持,内置大量钓鱼模板,设计用于组织级别红队渗透测试,用于团队组织设备型协同,经过非常多的实战演练,效果出众,远超同行产品,对于需要提高工作效率的朋友来说是个不错的选择。 工具功能介绍 SetoolMaster是一款让你入门即入狱的python3开发的进阶型社会工程学工具。包括了全球定位、Ngrok内网穿透、Seeker高精度定位、网页钓鱼、病毒攻击、恐吓勒索信、爬虫、网站克隆、物联网设备搜索等,同时拥有中文支持,内置大量钓鱼模板,设计用于组织级别红队渗透测试,用于团队组织设备型协同,经过非常多的实战演练,效果出众,远超同行产品 你看过电影里面的黑客么,手指在键盘上不停的在打字,屏幕上运行的数不清的计算机命令, 没过一会儿,便可以入侵、盗取别人的计算机密码、 没错,Setool Master就是这样一款黑客工具,设计用于红队的社会工程学攻击。比起传统 的漏洞利用,社会工程学攻击会更加的高效和安全,而且对于使用者的门槛会非常低,入门 linux的也能快速掌握。使用python3开发,有更加良好的发展属性和可读性、运行效率 非常的高,设计用于对组织级别的攻击 绝对不要使用Setool Master去攻击一个你不认识的人,或者你可能会遇到许麻烦 你不能将这些源代码用于商业用途 本开源项目内包含第三方工具,在这里说说明:ngrok,seeker-master 本开源项目允许引用,但受到Apache2开源条约限制 作者:LinWinCloud 版本维护 安卓源代码版本 持续维护 v Linux安装包版本 部分维护 v 安卓编译版本 不再维护 X linux编译版本 不再维护 X 源代码 持续维护 V 安装教程 $ git clone https://github.com/LinWin-Cloud/setool-master $ cd setool-master $ pip3 install whois $ pip3 install requests 1.源代码版本、安卓源代码版本 $ cd resources_code_vistion (这个是源代码版本) 或者 cd Android_Resources_code $ python3 setool.py 2.Linux安装包版本 $ 7z x Setool-Master.7z $ cd Setool-Master $ cd Setool-Master $ python3 install_linux.py 软件将安装在/var/Setool-Master,环境请自行配置 3.编译版本、安卓编译版本 $ cd build_vistion(这个是编译版本) 或者 cd Termax_Android_vistion (这个是安卓编译版本) $ chmod +x ./setool $ bash ./setool 使用文档 使用文档(英文版本) 使用文档(中文版本) 注意 本工具集内Web Console密码linwin用户名linwin 更新日志 v1.0.0 2022.1.5 发布Setool Linux轻量个人版本 v2.1.1 2022.3.5 发布Setool Master源代码版本 v2.1.2 2022.3.5 发布Setool Master安装包版本 v2.1.3 2022.3.15 发布Setool Master预编译版本 v2.1.4 2022.4.1 更新配置文件、告示 v2.2.1 2022.5.1 修改部分源代码 v2.3.2 2022.5.4 修改配置文件 v2.4.1 2022.5.7 修改配置文件,更新版本信息 v2.4.2 2022.5.8 修改配置文件和源代码 v2.5.1 2022.5.15 发布安卓Termux编译版本 v2.5.2 2022.5.17 更新安卓Termux编译版本 v2.5.3 2022.5.19 更新部分源代码 v2.5.4 2022.5.28 发布安卓Termux源代码版本 v2.5.5 2022.5.29 更新版本信息、更新源代码 v2.5.6 2022.5.30 修复部分代码错误、更新部分配置文件 v2.5.7 2022.5.31 更新 Setool Master编译版本 版本信息、配置文件 v2.5.8 2022.6.2 更新配置、版本信息 v2.5.9 2022.6.6 更新源代码版本代码 v2.6.0 2022.6.7 创建使用文档文档 v2.6.1 2022.6.10 更新 使用文档(英文版本) v2.6.2 2022.6.11 更新版本信息、配置信息 v2.6.2 2022.6.12 更新配置文件 v2.6.3 2022.6.13 更新 安卓源代码版本 源代码 v2.6.4 2022.6.15 更新使用文档、配置文件 v2.6.5 2022.6.16 更新配置文件 v2.6.6 2022.6.20 更新源代码 v2.6.7 2022.6.21 更新英语文档,创建中文文档 v2.6.8 2022.6.22 更新配置文件 v2.6.9 2022.6.24 更新安卓源代码,更新配置文件 v2.7.0 2022.6.26 修复源代码错误,修复帮助和配置 v2.7.1 2022.6.28 更新版本信息、更新配置文件 v2.7.2 2022.6.30 更新配置文件 v2.7.3 2022.7.3 更新配置文件,修复源码错误 v2.7.4 2022.7.5 更新项目为Setool Master LTS长期支持版本 v2.7.5 2022.7.6 更新源代码、修复IO操作漏洞 v2.7.6 2022.7.13 更新配置文件 v2.7.7 2022.7.22 更新配置文件,说明 v2.7.8 2022.7.23 更新中文帮助、更新配置文件 v2.7.9 2022.8.9 更新配置文件 v2.8.0 2022.8.31 更新配置文件、修复错误 v2.8.1 2022.9.12 修改文档 v2.8.2 2022.9.16 删除了Linux编译版本,不再维护此版本、修改了源代码、修改了说明文件 v2.8.3 2022.10.15 删除了部分无用文件、更新文档 About Setool Master is a open resources social enginnering tools for linux.android(termux). It is free.You do not pay some money for these tools. Setool Master use Python Code language.It is very easy and funny.You can use these resources code to make a new tools and so on.If you want to get Setool-Master,you can goto https://github.com/LinWin-Cloud/setool-master. https://gitee.com/LinWin-CLoud/setool-master Setool Master是一个适用于Linux、Android(termux)的开源的社会工程学 工具。它是免费的。你不需要为这些工具支付费用。Setool Master使用Python 编程语言。非常简单并且有趣,你能用这些源代码去创造一个新的工具等等。如果你 想获取SetoolMaster,你能够访问 https://github.com/LinWin-Cloud/setool-master. https://gitee.com/LinWin-CLoud/setool-master 该项目会持续维护,吸收大家的建议 项目维护真的不容易,开源项目不赚钱,本项目将保证永远也不进行商业收费 真心希望屏幕前面的你能够给开发者一些动力来维护更新这更好的项目 综合来看,setool-master在同类工具中还是有一定优势的,特别是在功能完整性和易用性方面表现不错。如果你有相关需求,可以下载试试。 {card-default label="📦 工具信息"} 🔧 工具名称:setool-master 👤 开发作者:LinWin-Cloud 📝 工具描述:SetoolMaster是一款让你入门即入狱的python3开发的进阶型社会工程学工具。包括了全球定位、Ngrok内网穿透、Seeker高精度定位、网页钓鱼、病毒攻击、恐吓勒索信、爬虫、网站克隆、物联网设备搜索等,同时拥有中文支持,内置大量钓鱼模板,设计用于组织级别红队渗透测试,用于团队组织设备型协同,经过非常多的实战演练,效果出众,远超同行产品 💻 开发语言:Python 📜 开源协议:未知开源协议 ⭐ Star数:3 | 🍴 Fork数:0 📅 更新时间:2025年06月18日 {/card-default} 本文介绍的工具来源于Gitee开源社区,仅供学习交流使用,请遵守原项目开源协议。
-
fscan 绿色软件分享 推荐一个实用的开源工具——fscan。项目由shadow1ng开发维护,GitHub上获得了 14514 个Star。简单来说,它是一款一款内网综合扫描工具方便一键自动化、全方位漏扫扫描。(内网综合扫描工具,实现一键自动化、全方位漏洞扫描),对于站长和开发者来说是个不错的工具。 工具功能介绍 English内网综合扫描工具,一键自动化漏扫。版本: 2.2.1 功能特性 扫描能力 主机发现 - ICMP/Ping存活探测,支持大网段B/C段存活统计 端口扫描 - TCP全连接扫描,内置133个常用端口,支持端口组(web/db/service/all) 服务识别 - 智能协议识别,支持20+种服务指纹匹配 Web探测 - 网站标题、CMS指纹、Web中间件、WAF/CDN识别(40+指纹) 爆破能力 弱密码爆破 - 28种服务爆破(SSH/RDP/SMB/FTP/MySQL/MSSQL/Oracle/Redis等) Hash碰撞 - 支持NTLM Hash认证(SMB/WMI) SSH密钥登录 - 支持私钥认证方式 智能字典 - 内置100+常见弱密码,支持{user}变量替换 漏洞检测 高危漏洞 - MS17-010(永恒之蓝)、SMBGhost(CVE-2020-0796) 未授权访问 - Redis/MongoDB/Memcached/Elasticsearch等未授权检测 POC扫描 - 集成Web漏洞POC,支持Xray POC格式 DNSLog - 支持DNSLog外带检测 漏洞利用 Redis利用 - 写公钥、写计划任务、写WebShell、主从复制RCE MS17-010利用 - ShellCode注入,支持添加用户、执行命令 SSH命令执行 - 认证成功后自动执行命令 本地模块 信息收集 - 系统信息、环境变量、域控信息、网卡配置 凭据获取 - 内存转储(MiniDump)、键盘记录、注册表导出 权限维持 - Systemd服务、Windows服务、计划任务、启动项、LD_PRELOAD 反弹Shell - 正向Shell、反向Shell、SOCKS5代理服务 杀软检测 - 识别目标主机安装的安全软件 痕迹清理 - 日志清理工具 输入输出 目标输入 - IP/CIDR/域名/URL,支持文件批量导入 排除规则 - 支持排除特定主机、端口 输出格式 - TXT/JSON/CSV多格式输出 静默模式 - 无Banner、无进度条、无颜色输出 网络控制 代理支持 - HTTP/SOCKS5代理,支持指定网卡 发包控制 - 速率限制、最大发包数量控制 超时控制 - 端口超时、Web超时、全局超时独立配置 并发控制 - 端口扫描线程、服务扫描线程独立配置 扩展功能 SDK嵌入 - pkg/fscan提供Go SDK,可嵌入Agent或安全平台,支持任务控制(Pause/Resume)、实时进度回调、TaskID追溯 Web管理界面 - 可视化扫描任务管理(条件编译 -tags web) Lab靶场环境 - 内置Docker靶场用于测试学习 插件化架构 - 服务插件/Web插件/本地插件分离,易于扩展 多语言支持 - 中英文界面切换(-lang zh/en) 性能统计 - JSON格式性能报告(-perf) v2.1.0 更新日志> 本次更新包含 262个提交,涵盖30项新功能、120项修复、54项重构、14项性能优化、20项测试增强。 架构重构 全局变量消除 - 迁移至Config/State对象,提升并发安全和可测试性 SMB插件融合 - 整合smb/smb2/smbghost/smbinfo为统一插件,新增smb_protocol.go 服务探测重构 - 实现Nmap风格fallback机制,优化端口指纹识别策略 输出系统重构 - TXT实时刷盘+双写机制,解决结果丢失和乱序问题 i18n框架升级 - 迁移至go-i18n,完整覆盖core/plugins/webscan模块 HostInfo重构 - Ports字段从string改为int,类型安全 函数复杂度优化 - clusterpoc(125→30)、EnhancedPortScan(111→20) 代码审计 - 修复P0-P2级别问题,清理deadcode 日志系统优化 - LogDebug调用清理(71→18),精简启动日志输出 性能优化 正则预编译 - 全局正则表达式预编译,避免重复编译开销 内存优化 - map[string]bool改为map[string]struct{}节省内存 并发指纹匹配 - 多协程并行匹配,提升识别速度 连接复用 - SOCKS5全局拨号器复用,避免重复握手 滑动窗口调度 - 自适应线程池+流式迭代器,优化端口扫描 CEL缓存优化 - POC扫描CEL环境缓存,减少重复初始化 包级变量提取 - proxyFailurePatterns/resourceExhaustedPatterns/sslSecondProbes等 预分配容量 - 简化转换链、单次字符串替换 并发安全优化 - 优化锁粒度和内存分配 新功能 Web管理界面 - 可视化扫描任务管理,响应式布局和进度显示 多格式POC适配 - 支持xray和afrog格式POC 智能扫描模式 - 布隆过滤器去重+代理优化 增强指纹库 - 集成FingerprintHub(3139条指纹) Favicon指纹识别 - 支持mmh3和MD5双格式hash匹配 通用版本提取器 - 自动提取服务版本信息 指纹优先级排序 - 智能排序匹配结果 智能协议检测 - 自动识别HTTP/HTTPS协议类型 网卡指定功能 - 支持VPN场景(-iface参数) 排除主机文件 - 支持从文件读取排除主机(-ehf参数) ICMP令牌桶限速 - 防止高速扫描导致路由器崩溃 端口扫描重试 - 失败自动重扫机制 RDP真实认证 - 集成grdp库实现系统指纹识别 SMB/FTP文件列表 - 匿名访问时自动列出文件 302跳转双重识别 - 同时识别原始响应和跳转后响应指纹 TXT输出URL汇总 - 末尾添加Web服务URL列表便于批量测试 nmap核心集成 - 三大改进:探测策略/匹配引擎/版本解析 插件选择性编译 - Build Tags系统,支持服务/本地/Web插件独立编译 默认端口扩展 - 从62个扩展到133个常用端口 全端口扫描支持 - 扩大端口范围限制 HTTP重定向控制 - 可配置的重定向次数限制 性能分析支持 - 添加pprof性能分析和benchmark测试 TCP包统计 - 服务插件支持TCP包发送统计 fscan-lab靶场 - 内网渗透训练平台,覆盖全部漏洞场景(未完成) Redis利用增强 - 移植完整Redis利用功能(写公钥/计划任务/WebShell/主从RCE) rsync插件重构 - 使用go-rsync库重构认证逻辑 Bug修复(120项,列出关键修复) RDP空指针panic - 修复证书解析导致的崩溃(#551) 批量扫描漏报 - 修复大规模扫描遗漏问题(#304) JSON输出格式 - 修复输出格式错误(#446) Redis弱密码检测 - 修复检测遗漏问题(#447) 结果实时保存 - 修复扫描结果未及时保存(#469) Nmap解析溢出 - 修复八进制转义解析bug(#478) 指纹识别竞态 - 修复webtitle/webpoc竞态问题(#474) MySQL连接验证 - 改用information_schema库验证 代理端口误判 - 修复代理模式下端口状态判断错误 Context超时 - 修复22处插件超时未响应问题 ICMP竞态条件 - 修复并发扫描竞争问题 IPv6地址格式 - 修复4处地址格式化问题 POC高并发卡死 - 修复Context未传播问题 Ctrl+C结果丢失 - 添加信号处理确保结果写入 SOCKS5全回显 - 添加代理连接验证 服务探测泄漏 - 修复连接未正确关闭问题 webtitle响应丢弃 - 修复部分响应数据被丢弃导致识别失败 TXT漏洞信息缺失 - 修复输出遗漏漏洞详情 JSON指纹缺失 - 统一SERVICE结果Target格式 扫描耗时显示 - 修复完成耗时显示为0的问题 虚假漏洞记录 - 重构TXT输出系统消除误报 Redis跨平台路径 - 修复利用功能的路径和超时问题 Windows编译警告 - 修复fscan-lite平台兼容性 Go 1.20兼容 - 降级依赖保持兼容性 测试增强(20项) 单元测试 - 核心模块覆盖率74-100% 并发安全测试 - State对象、指纹匹配引擎专项测试 集成测试 - Web扫描/端口扫描/服务探测/SSH认证/ICMP探测 CLI参数测试 - 命令行参数解析验证 性能基准测试 - AdaptivePool、服务探测策略benchmark ResultBuffer测试 - 去重和完整度评分验证 工程化改进 CI流程优化 - golangci-lint v2升级,简化构建步骤 Issue自动化 - GitHub Issue模板优化,Project自动化工作流 Lint全量修复 - revive/errcheck/shadow/staticcheck/gosimple全部通过 README重写 - 中英文文档全面更新 代码格式统一 - gofmt/goimports规范化 快速开始 bash # 扫描C段 ./fscan -h 192.168.1.1/24 # 指定端口 ./fscan -h 192.168.1.1 -p 22,80,443,3389 # 仅存活探测 ./fscan -h 192.168.1.1/24 -ao # 禁用爆破 ./fscan -h 192.168.1.1/24 -nobr # Web扫描 ./fscan -u http://192.168.1.1 # 本地插件 ./fscan -local systeminfo # Hash碰撞 ./fscan -h 192.168.1.1 -m smb2 -user admin -hash xxxxx # Redis写公钥 ./fscan -h 192.168.1.1 -m redis -rf id_rsa.pub 编译 bash # 标准编译 go build -ldflags="-s -w" -trimpath -o fscan . # 带Web管理界面 go build -tags web -ldflags="-s -w" -trimpath -o fscan-web . 安装 bash # Arch Linux yay -S fscan-git 运行截图fscan.exe -h 192.168.x.x 图片fscan.exe -h 192.168.x.x -rf id_rsa.pub (Redis写公钥) 图片fscan.exe -h 192.168.x.x -m ssh -user root -pwd password 图片fscan.exe -h 192.168.x.x -m ssh -user root -pwda pass1 pass2 pass3 (追加多个密码)fscan.exe -h 192.168.x.x -p80 -proxy http://127.0.0.1:8080 图片fscan.exe -h 192.168.x.x -socks5 socks5://user:pass@127.0.0.1:1080 (SOCKS5认证代理)fscan.exe -h 192.168.x.x -p 139 -m netbios 图片fscan.exe -h 192.0.0.0/8 -m icmp img.png图片2.0-1图片2.0-2图片 路线图 更新计划 更新周期 - 每月一次版本发布 前两周 - 新功能开发与特性更新 后两周 - Bug修复与代码整合 欢迎PR - 期待您的贡献! SDK & Agent 集成 扩展SDK能力,完善端侧Agent嵌入支持 断点续扫、带宽级限速、内存水位控制 更多Agent场景的集成示例 插件生态 持续扩展服务插件覆盖范围 为每个服务插件开发更多漏洞检测和利用能力 保持插件API向后兼容,确保旧版本POC持续可用 Fscan-lite C语言重写的轻量版本 更小的体积,更少的依赖 支持更多嵌入式/受限环境 目录: fscan-lite Fscan-lab 内网渗透测试靶场环境 覆盖所有fscan支持的漏洞场景 开发测试与功能验证平台 新手学习与技能练习环境 目录: fscan-lab 免责声明本工具仅面向合法授权的企业安全建设行为。使用前请确保已获得授权,符合当地法律法规,不对非授权目标扫描。作者不承担任何非法使用产生的后果。 404StarLink图片fscan 是 404Team 星链计划2.0 成员项目。 Star趋势 捐赠请作者喝饮料 参考- https://github.com/Adminisme/ServerScan https://github.com/netxfly/x-crack https://github.com/hack2fun/Gscan https://github.com/k8gege/LadonGo https://github.com/jjf012/gopoc https://github.com/chainreactors/gogo https://github.com/0x727/FingerprintHub https://github.com/killmonday/fscanx {card-default label="📦 工具信息"} 🔗 项目地址:https://github.com/shadow1ng/fscan ⭐ Star数:14514 💻 开发语言:Go 📝 项目描述:一款内网综合扫描工具方便一键自动化、全方位漏扫扫描。(内网综合扫描工具,实现一键自动化、全方位漏洞扫描) {/card-default} 总的来说,fscan是一个功能比较实用的开源工具,适合日常工作和学习使用。如果你正在寻找一款相关工具,不妨下载试试。使用前建议仔细阅读项目文档。 本文介绍的工具来源于GitHub开源社区,仅供学习交流使用,请遵守原项目开源协议。
-
vibe-pentest 是什么?好用的工具软件推荐 今天给大家分享一款实用的开源工具——vibe-pentest。这个工具在Gitee上获得了22个Star,主要功能是Vibe Pentest 是一款基于 AI Agent 架构的自动化渗透测试工具,采用多 Agent 并行执行架构,能够对 Web 应用、API、管理后台等进行全面的黑盒渗透测试(包括业务逻辑漏洞评估),输出稳定可靠的安全报告,提供可落地整改建议。,对于需要提高工作效率的朋友来说是个不错的选择。 工具功能介绍 中文 | English Vibe Pentest 当前版本:v1.0.30Vibe Pentest(AI 渗透测试)是一款基于 AI Agent 架构的自动化渗透测试工具,采用多 Agent 并行执行架构,能够对 Web 应用、API、管理后台等进行全面的黑盒渗透测试(包括业务逻辑漏洞评估),输出稳定可靠的安全报告,并提供可落地的整改建议。 最适合安全服务公司与个人白帽子的 AI 渗透测试工具。内置白帽子职业操守约束,全程遵循最小影响原则:获得有效证据后即停止不必要的重复利用、扩散操作。具备创新独特的“低影响高回报渗透模式”、深入挖掘漏洞的“标准模式”。目录 流程示意图 提示词示例(强烈推荐使用) 三分钟教学视频 三步骤快速安装 环境运行依赖 工作目录与报告输出 HTTP 代理配置(可选) 自定义 POC 与指纹规则(可选) 免责声明 流程示意图 流程示意图图片 提示词示例(强烈推荐使用) Agent 选择参考 使用 AI 智能体软件调用本技能,即可开启氛围渗透(Vibe Pentest),会自动创建多个不同角色分工的 Agent 自动挖掘漏洞,子 Agent 详细定义可参考 references/sub_agents。 Agent检测方向何时可跳过injection-agentSQLi、XSS、SSRF、RCE、SSTI 等注入类漏洞不建议跳过,大部分 Web 应用均需检测poc-agent基于指纹匹配已知 CVE/POC 验证不建议跳过,指纹识别后可自动匹配已知漏洞,投入产出比高api-agentAPI 安全、BOLA/BFLA、隐藏接口、过度数据返回不建议跳过,现代 Web 应用普遍暴露 API 接口,未授权访问和越权是最高频的攻击面auth-agent认证绕过、暴力破解、会话管理、CSRF、用户枚举不建议跳过,有登录/鉴权功能就必须检测file-agent文件上传/下载/包含、路径穿越、Zip Slip无文件操作(上传/下载/导入/预览)的纯数据应用可跳过business-agent业务逻辑绕过、竞态条件、价格篡改、优惠券滥用无交易/订单/支付/积分/配额的信息展示类站点可跳过misc-agent安全头缺失、开放重定向、点击劫持、CORS不关注中低危信息类问题时可跳过1. 低影响高回报渗透模式(可批量渗透) 如果担心 AI 渗透影响目标,又想尽可能发现高价值漏洞,可以选择三种对目标系统影响较小的渗透 Agent,具体提示词如下。 这种模式可以一次批量渗透多个目标,但建议一次任务会话建议不超过 10 个目标,因为大模型上下文有限,不建议一次任务会话太多目标,影响渗透效果。 text 使用 vibe-pentest 对以下目标进行渗透测试: 目标 URL: `https://example1.com` `https://example2.com` 授权声明: 已获得用户授权,授权范围包含以上目标全部接口和页面 本次启用的子 Agent(共 3 个): - api-agent(API 安全检测,优先挖掘潜在高风险 API) - auth-agent(认证绕过检测与可暴力破解风险分析,不执行暴力破解) - poc-agent(已知漏洞 POC 验证,禁止使用任何可能影响目标系统正常运行的 POC) 总原则: 1. 仅启动上述指定的 3 个子 Agent 并行渗透,所有子 Agent 必须主动深挖,不得等我提示。 2. 使用 `scripts/run_gospider.py` 调用 GoSpider 爬虫(GoSpider 须在沙箱外运行),爬虫运行结束后,须查看爬虫状态文件 `gospider_status.json`,只有 `status = completed` 才能进入下一步。 3. 不允许因为测试失败就直接停止,需要基于失败原因尝试 2-3 次绕过检查。 4. 只允许 `poc-agent` Agent 联网搜索 POC,禁止使用任何可能影响目标系统正常运行的 POC。 5. `auth-agent` Agent 只需检测认证绕过漏洞,以及是否存在可被暴力破解风险,不用检测其它漏洞以及执行暴力破解。 6. 未列出的 Agent 不启用,对应的漏洞类型不做检测,报告中也不需要出现这些 Agent 的章节。 白帽子职业操守:允许对测试过程中由自己创建的数据、上传的文件和插入的记录进行删除、修改、恢复和清理,以验证相关安全风险;禁止破坏原始业务数据、真实用户账号与会话、生产数据或超出验证目的的业务对象;所有测试行为应遵循最小影响原则,在获得有效证据后停止不必要的重复利用和扩散操作。 请按 vibe-pentest 流程执行: Phase 0 指纹识别 → Phase 0.5 后台入口扫描 → Phase 1 API 预扫描 → Phase 2 浏览器登录提取凭证(如提供账号) → Phase 3 GoSpider 爬虫 → Phase 4 数据清洗 → Phase 4.5 指纹汇总 → Phase 5 使用脚本(`prepare_agent_findings.py`)预生成骨架文件 + 分发已启用的子 Agent 并行渗透测试 → Phase 6 调用本技能现有脚本生成报告(`generate_report.py`、`generate_html.py`、`generate_word.py`) → 最后把 HTML 和 Word 输出到当前目录的 workspace/,并进行格式检查。 2. 标准渗透模式(使用 6 种常用 Agent) 标准渗透模式,建议一次任务会话只渗透一个站点,可以更好的保证渗透效果。(misc-agent 一般只检出低危漏洞,标准渗透可跳过) 如果有测试账号,渗透过程会自动弹出浏览器,您手工输入账号密码(输入后等浏览器自动关闭),即可进行登录后的渗透测试;如果没有测试账号,以下提示词可以删除掉相关内容。 text 使用 vibe-pentest 对以下目标进行渗透测试: 目标 URL: https://example.com 授权声明: 已获得用户授权,授权范围包含以上目标全部接口和页面 测试账号(只测试 1 个角色): 1. 角色:管理员 账号:admin 密码:123456 登录方式:你调用 `scripts/extract_credentials.py` 打开浏览器,我手动输入账号密码登录 本次启用的子 Agent(共 6 个): - api-agent(API 安全检测) - injection-agent(注入漏洞检测) - file-agent(文件上传漏洞检测) - business-agent(业务逻辑类漏洞检测) - auth-agent(认证与会话检测,暴力破解总次数 120 次) - poc-agent(已知漏洞 POC 验证,禁止使用任何可能影响目标系统正常运行的 POC) 总原则: 1. 仅启动上述指定的 6 个子 Agent 并行渗透,所有子 Agent 必须主动深挖,不得等我提示。 2. 使用 `scripts/run_gospider.py` 调用 GoSpider 爬虫(GoSpider 须在沙箱外运行),爬虫运行结束后,须查看爬虫状态文件 `gospider_status.json`,只有 `status = completed` 才能进入下一步。 3. 不允许把"发现入口"当成完成;必须继续测试同功能族下的二级、三级动作、隐藏参数、批量操作、详情页、导出页、删除页、上传页、预览页、恢复页等。只要有功能入口,就必须做对应漏洞测试,不能因为看起来普通就跳过。 4. 不允许因为测试失败就直接停止,需要基于失败原因尝试 2-3 次绕过检查。 5. 只允许 `poc-agent` Agent 联网搜索 POC,禁止使用任何可能影响目标系统正常运行的 POC。 6. 未列出的 Agent 不启用,对应的漏洞类型不做检测,报告中也不需要出现这些 Agent 的章节。 白帽子职业操守:允许对测试过程中由自己创建的数据、上传的文件和插入的记录进行删除、修改、恢复和清理,以验证相关安全风险;禁止破坏原始业务数据、真实用户账号与会话、生产数据或超出验证目的的业务对象;所有测试行为应遵循最小影响原则,在获得有效证据后停止不必要的重复利用和扩散操作。 请按 vibe-pentest 流程执行: Phase 0 指纹识别 → Phase 0.5 后台入口扫描 → Phase 1 API 预扫描 → Phase 2 浏览器登录提取凭证(如提供账号) → Phase 3 GoSpider 爬虫 → Phase 4 数据清洗 → Phase 4.5 指纹汇总 → Phase 5 使用脚本(`prepare_agent_findings.py`)预生成骨架文件 + 分发已启用的子 Agent 并行渗透测试 → Phase 5.5 攻击链分析 → Phase 5.6 漏洞证据复查 → Phase 6 调用本技能现有脚本生成报告(`generate_report.py`、`generate_html.py`、`generate_word.py`) → 最后把 HTML 和 Word 输出到当前目录的 workspace/,并进行格式检查。 三分钟教学视频 AI 渗透过程中,要确保智能体软件会调用多个不同角色分工的 Agent 并行渗透,否则会影响渗透质量和效率。 视频包含智能体软件安装介绍、多 Agent 并行渗透演示:氛围渗透(Vibe Pentest)3 分钟使用教程 三步骤快速安装 安装 AI 智能体软件(已安装可忽略) 优先推荐编程类智能体软件:Qoder、Zcode、DeepSeek Harness、Claude Code、OpenCode 等 注意:codex、workbuddy 不太兼容 AI 渗透测试过程中并发多 Agent 的能力 手工安装 Git 代码管理软件工具 请先手工安装 Git 工具,方便后续从代码仓库克隆技能、以及自动更新技能。 Git 工具官方下载地址:git-scm.com。 输入提示词,让 AI 智能体软件自动安装本技能和环境依赖 Git 安装完成后,在 AI 智能体软件中直接发送下面这段提示词即可: text 帮我安装 vibe-pentest skill(包括环境运行依赖),仓库地址:https://gitee.com/ok-helloworld/vibe-pentest 环境运行依赖 Git 强烈推荐先安装 Git,并使用 git clone 获取本项目,不要使用网页下载 ZIP 压缩包的方式使用项目。 推荐优先从 Gitee 克隆,访问更顺畅: bash git clone https://gitee.com/ok-helloworld/vibe-pentest 推荐原因: 只有 Git 仓库方式才能配合项目内的自动更新机制,持续获取最新的技能规则、脚本能力和参考资料 这样可以让 AI 智能体持续获得最新的渗透测试流程、检测方法和能力增强 Python 建议使用 Python 3.10+ 先安装 Python 依赖: bash pip install -i https://pypi.tuna.tsinghua.edu.cn/simple python-docx matplotlib requests urllib3 httpx charset-normalizer chardet playwright PySocks socksio pyyaml mmh3 再安装 Playwright 浏览器依赖,遇到复杂验证码可以调用脚本手工输入账号密码: bash playwright install chromium 如果下载卡住或过慢,先切换到国内镜像再安装: bash # Linux/macOS export PLAYWRIGHT_DOWNLOAD_HOST=https://cdn.npmmirror.com/binaries/playwright # Windows PowerShell(Windows CMD 用 set) $env:PLAYWRIGHT_DOWNLOAD_HOST="https://cdn.npmmirror.com/binaries/playwright" playwright install chromium 爬虫组件 默认不内置 GoSpider 爬虫二进制;可直接运行 scripts/run_gospider.py 自动下载对应当前运行环境的 GoSpider 爬虫版本: bash python scripts/run_gospider.py --download-only 工作目录与报告输出 本技能的所有输出都会写入到当前工作目录下的 workspace/ 文件夹,最终报告位于 workspace/report_result/。 建议每个渗透测试任务使用单独的工作目录,方便区分不同任务的中间文件和最终报告。 若智能体能按照 Skill 正常执行,创建多 Agent 进行渗透测试,最终会生成格式规范的渗透测试报告。当前仓库中的报告样例 Report_Template_pikachu_v1.0.html 即使用 Qoder + DeepSeek V4 Pro 跑出的实际效果示例。 HTTP 代理配置(可选) 本工具支持在指纹探测、API 探测、后台扫描和渗透测试阶段使用代理配置(爬虫除外),支持 HTTP/HTTPS 代理和 SOCKS5 隧道。合理使用代理可以降低高频请求导致的封 IP、限流或访问受限等影响。 默认不走代理 代理配置默认读取 config/http_test.json 具体配置说明见 config/proxy_usage.md 自定义 POC 与指纹规则(可选) 本工具默认自带部分 POC 和指纹规则,同时支持自定义,以扩展对特定产品/漏洞的检测能力。 支持自动联网搜索 POC,默认参考来源主要为 GitHub;如需追加自定义搜索源,请参考 pocs/POC_SEARCH_SOURCES_USER.md,并确保运行环境可访问这些来源 支持自定义 POC,详见 pocs/README.md 支持自定义指纹规则,详见 scripts/fingerprints_rules/README.md 指纹 → POC 联动机制 须注意,自定义指纹与自定义 POC 是联动关系。 poc-agent 会读取指纹识别结果(fingerprint.json 的 tech_stack 字段),提取产品名作为关键字,并在 POC 目录中搜索匹配的 POC YAML 文件,只对目标发送匹配的 POC 请求。 免责声明 本技能旨在帮助安全研究人员、渗透测试人员和 IT 专业人员在获得明确授权的情况下进行安全评估和漏洞研究。 使用本工具即表示您同意: 仅在您拥有明确书面授权的系统上使用此工具 遵守所有适用的法律法规和道德准则 对任何未经授权的使用或滥用行为承担全部责任 不会将本工具用于任何非法或恶意目的 开发者不对任何滥用行为负责! 请确保您的使用符合当地法律法规,并获得目标系统所有者的明确授权。 综合来看,vibe-pentest在同类工具中还是有一定优势的,特别是在功能完整性和易用性方面表现不错。如果你有相关需求,可以下载试试。 {card-default label="📦 工具信息"} 🔧 工具名称:vibe-pentest 👤 开发作者:ok-helloworld 📝 工具描述:Vibe Pentest 是一款基于 AI Agent 架构的自动化渗透测试工具,采用多 Agent 并行执行架构,能够对 Web 应用、API、管理后台等进行全面的黑盒渗透测试(包括业务逻辑漏洞评估),输出稳定可靠的安全报告,提供可落地整改建议。 💻 开发语言:未知 📜 开源协议:未知开源协议 ⭐ Star数:22 | 🍴 Fork数:2 📅 更新时间:2026年09月07日 {/card-default} 本文介绍的工具来源于Gitee开源社区,仅供学习交流使用,请遵守原项目开源协议。
-
白帽黑客工具箱:xmrig 篇 推荐一个实用的开源工具——xmrig。项目由xmrig开发维护,GitHub上获得了 10114 个Star。简单来说,它是一款RandomX、KawPow、CryptoNight和GhostRider统一CPU/GPU矿机和RandomX基准测试,对于站长和开发者来说是个不错的工具。 工具功能介绍 XMRig is a high performance, open source, cross platform RandomX, KawPow, CryptoNight and GhostRider unified CPU/GPU miner and RandomX benchmark. Official binaries are available for Windows, Linux, macOS and FreeBSD. Mining backends CPU (x86/x64/ARMv7/ARMv8/RISC-V) OpenCL for AMD GPUs. CUDA for NVIDIA GPUs via external CUDA plugin. Download Binary releases Build from source Usage The preferred way to configure the miner is the JSON config file as it is more flexible and human friendly. The command line interface does not cover all features, such as mining profiles for different algorithms. Important options can be changed during runtime without miner restart by editing the config file or executing API calls.* Wizard helps you create initial configuration for the miner. Workers helps manage your miners via HTTP API. Donations Default donation 1% (1 minute in 100 minutes) can be increased via option donate-level or disabled in source code. XMR: 48edfHu7V9Z84YzzMa6fUueoELZ9ZRXq9VetWzYGzKt52XU5xvqgzYnDK9URnRoJMk1j8nLwEVsaSWJ4fhdUyZijBGUicoD Developers xmrig sech1 Contacts support@xmrig.com reddit twitter {card-default label="📦 工具信息"} 🔗 项目地址:https://github.com/xmrig/xmrig ⭐ Star数:10114 💻 开发语言:C 📝 项目描述:RandomX、KawPow、CryptoNight和GhostRider统一CPU/GPU矿机和RandomX基准测试 {/card-default} 总的来说,xmrig是一个功能比较实用的开源工具,适合日常工作和学习使用。如果你正在寻找一款相关工具,不妨下载试试。使用前建议仔细阅读项目文档。 本文介绍的工具来源于GitHub开源社区,仅供学习交流使用,请遵守原项目开源协议。
-
vuls - 提升工作效率的好帮手 推荐一个实用的开源工具——vuls。项目由future-architect开发维护,GitHub上获得了 12253 个Star。简单来说,它是一款适用于Linux、FreeBSD、Container、WordPress、编程语言库、网络设备的无代理漏洞扫描程序,对于站长和开发者来说是个不错的工具。 工具功能介绍 Vuls-logo图片Vulnerability scanner for Linux/FreeBSD, agent-less, written in Go. Twitter: @vuls_enVuls-Abstract图片Vulsrepo图片Vuls-slack图片---- Abstract For a system administrator, having to perform security vulnerability analysis and software update on a daily basis can be a burden. To avoid downtime in a production environment, it is common for a system administrator to choose not to use the automatic update option provided by the package manager and to perform update manually. This leads to the following problems.- The system administrator will have to constantly watch out for any new vulnerabilities in NVD (National Vulnerability Database) or similar databases. It might be impossible for the system administrator to monitor all the software if there are a large number of software packages installed in the server. It is expensive to perform analysis to determine the servers affected by new vulnerabilities. The possibility of overlooking a server or two during analysis is there.Vuls is a tool created to solve the problems listed above. It has the following characteristics.- Informs users of the vulnerabilities that are related to the system. Informs users of the servers that are affected. Vulnerability detection is done automatically to prevent any oversight. A report is generated on a regular basis using CRON or other methods. to manage vulnerability.Vuls-Motivation图片---- Main Features Scan for any vulnerabilities in Linux/FreeBSD/Windows/macOSSupports major Linux/FreeBSD/Windows/macOS- Alpine, Amazon Linux, CentOS, AlmaLinux, Rocky Linux, Debian, Oracle Linux, Raspbian, RHEL, openSUSE, openSUSE Leap, SUSE Enterprise Linux, Fedora, and Ubuntu FreeBSD Windows macOS Cloud, on-premise, Running Docker Container High-quality scan- Vulnerability Database NVD JVN(Japanese)- OVAL Red Hat Debian Ubuntu SUSE Oracle Linux- Security Advisory Alpine-secdb Red Hat Security Advisories Debian Security Bug Tracker Ubuntu CVE Tracker Microsoft CVRF- Commands(yum, zypper, pkg-audit) RHSA / ALAS / ELSA / FreeBSD-SA Changelog- PoC, Exploit Exploit Database Metasploit-Framework modules qazbnm456/awesome-cve-poc nomi-sec/PoC-in-GitHub gmatuz/inthewilddb projectdiscovery/nuclei-templates- CERT US-CERT JPCERT- KEV CISA(Cybersecurity & Infrastructure Security Agency): Known Exploited Vulnerabilities Catalog VulnCheck: VulnCheck KEV- Cyber Threat Intelligence(MITRE ATT&CK and CAPEC) mitre/cti- Libraries aquasecurity/vuln-list- WordPress wpscan Scan modeFast Scan- Scan without root privilege, no dependencies Almost no load on the scan target server Offline mode scan with no internet access. (CentOS, Alma Linux, Rocky Linux, Debian, Oracle Linux, Red Hat, Fedora, and Ubuntu)Fast Root Scan- Scan with root privilege Almost no load on the scan target server Detect processes affected by update using yum-ps (Amazon Linux, CentOS, Alma Linux, Rocky Linux, Oracle Linux, Fedora, and RedHat) Detect processes which updated before but not restarting yet using checkrestart of debian-goodies (Debian and Ubuntu) Offline mode scan with no internet access. (CentOS, Alma Linux, Rocky Linux, Debian, Oracle Linux, Red Hat, Fedora, and Ubuntu) Remote, Local scan mode, Server modeRemote scan mode- User is required to only set up one machine that is connected to other target servers via SSHLocal scan mode- If you don't want the central Vuls server to connect to each server by SSH, you can use Vuls in the Local Scan mode.Server mode- First, start Vuls in server mode and listen as an HTTP server. Next, issue a command on the scan target server to collect software information. Then send the result to Vuls Server via HTTP. You receive the scan results as JSON format. No SSH needed, No Scanner needed. Only issuing Linux commands directory on the scan target server. Dynamic Analysis- It is possible to acquire the state of the server by connecting via SSH and executing the command. Vuls warns when the scan target server was updated the kernel etc. but not restarting it. Scan vulnerabilities of non-OS-packages- Libraries of programming language Self-compiled software Network DevicesVuls has some options to detect the vulnerabilities- Lockfile based Scan GitHub Integration Common Platform Enumeration (CPE) based Scan OWASP Dependency Check Integration Scan WordPress core, themes, plugins- Scan WordPress MISC- Nondestructive testing Pre-authorization is NOT necessary before scanning on AWS Vuls works well with Continuous Integration since tests can be run every day. This allows you to find vulnerabilities very quickly. Auto-generation of configuration file template Auto-detection of servers set using CIDR, generate configuration file template Email and Slack notification is possible (supports Japanese language) Scan result is viewable on accessory software, TUI Viewer in a terminal or Web UI (VulsRepo).---- What Vuls Doesn't Do- Vuls doesn't update the vulnerable packages.---- Document For more information such as Installation, Tutorial, Usage, visit vuls.io 日本語翻訳ドキュメント---- Authorskotakanbe (@kotakanbe) created vuls and these fine people have contributed. Contributesee vulsdoc---- Sponsors| | | Tines is no-code automation for security teams. Build powerful, reliable workflows without a development team. SAKURA internet Inc. is an Internet company founded in 1996. We provide cloud computing services such as "Sakura's Shared Server", "Sakura's VPS", and "Sakura's Cloud" to meet the needs of a wide range of customers, from individuals and corporations to the education and public sectors, using its own data centers in Japan. Based on the philosophy of "changing what you want to do into what you can do," we offer DX solutions for all fields.----License Please see LICENSE. {card-default label="📦 工具信息"} 🔗 项目地址:https://github.com/future-architect/vuls ⭐ Star数:12253 💻 开发语言:Go 📝 项目描述:适用于Linux、FreeBSD、Container、WordPress、编程语言库、网络设备的无代理漏洞扫描程序 {/card-default} 总的来说,vuls是一个功能比较实用的开源工具,适合日常工作和学习使用。如果你正在寻找一款相关工具,不妨下载试试。使用前建议仔细阅读项目文档。 本文介绍的工具来源于GitHub开源社区,仅供学习交流使用,请遵守原项目开源协议。
-
站长必备!hackingtool 效率神器分享 推荐一个实用的开源工具——hackingtool。项目由Z4nzu开发维护,GitHub上获得了 79344 个Star。简单来说,它是一款面向黑客的一体化黑客工具,对于站长和开发者来说是个不错的工具。 工具功能介绍 215 curated tools across 21 categories — recon, OSINT, web, wireless, phishing, forensics, post-exploitation and more — with an **AI layer that turns plain English into the right tool and the exact command.Built for** penetration testers · red teamers · blue-team/SOC and DFIR analysts · OSINT researchers · bug-bounty hunters · CTF players · security researchers and students — all working legally, on systems they own or are authorised to test. 图片 图片 图片 图片 图片 --- Contents- Why hackingtool Tool Categories Installation From source with pipx (recommended) For development Docker Optional runtimes Quick Commands Command reference Features 🔎 /find — a tool for a need you don't have yet 🎯 /goal — plan an objective, run it one step at a time 🧠 Recommendations — say what you want in plain English 🏷 Tags and search ▶ Background panes (tmux) ⚙ Settings and the AI layer 📋 Headless engagements Documentation Contributing Support & Sponsor Social--- Why hackingtool- 🧠 AI-guided workflow — describe what you want ("find subdomains of example.com") and it maps your intent to the right tools, hands you the exact documented command, plans an objective step by step, then summarizes findings and drafts an engagement report. Bring your own key or run a local model — nothing auto-executes and nothing is fabricated. 🗂 215 curated tools, one console — install and run across 21 categories without hunting down Git repos; a fixed tag taxonomy (63 tags in use) makes every tool discoverable. 🔎 It knows what it doesn't have — /find searches your catalog first, then the GitHub API, and shows real maintained projects with the reason each was ranked. 🛡 Safe by default — standard installs, no curl | bash, downloads pinned + SHA-256 verified, list-form subprocess, no forced sudo, and signed releases with an SBOM. 🎯 For the whole spectrum — red team, blue team, OSINT, bug bounty, CTF/THM, forensics/IR — all on authorized targets only. The console on launch — live system readout, and / opens the command palette. Tool Categories215 tools across 21 categories — the full list, with links and tags, is in docs/TOOLS.md.| | Category | Tools | | | Category | Tools | 1🛡 Anonymously Hiding Tools5 12🔁 Reverse engineering tools102🔍 Information gathering tools26 13⚡ DDOS Attack Tools73📚 Wordlist Generator8 14🖥 Remote Administrator Tools (RAT)44📡 Wireless attack tools17 15🧪 XSS Attack Tools65💉 SQL Injection Tools7 16🖼 Steganography Tools106🎣 Phishing attack tools13 17🏢 Active Directory Tools107🌐 Web Attack tools23 18☁ Cloud Security Tools78🔧 Post exploitation tools15 19📱 Mobile Security Tools69🕵 Forensic tools12 20✨ Other tools1010📦 Payload creation tools6 21🔑 Password / Hash Cracking711🧰 Exploit framework6 59 further entries are archived (unmaintained or dead upstream) and hidden unlessyou set show_archived true via /config. The in-app header counts 22 categories / 217 tools because it also counts the built-in Update / Uninstall menu.--- Installation Requires Python 3.10+ on Linux or macOS (Kali, Parrot, Debian/Ubuntu, Arch, …). Windows is not supported — the app tells you so and exits. No curl | bash: every path below is a standard, verifiable install. From source with pipx (recommended)pipx installs hackingtool into its own isolated environment and puts the hackingtool command on your PATH, so you can launch it from any directory. bash # 1 — get the code git clone https://github.com/Z4nzu/hackingtool.git cd hackingtool # 2 — install it onto your PATH (isolated venv, no system Python touched) pipx install . # 3 — run it from anywhere hackingtool No pipx yet? bash # macOS brew install pipx && pipx ensurepath # Debian / Ubuntu / Kali sudo apt install pipx && pipx ensurepath Open a new shell after pipx ensurepath so the PATH change takes effect. To update later: git pull && pipx install . --force. To remove it: pipx uninstall hackingtool. Alternative: uv tool install . (same result, uses uv instead of pipx) bash git clone https://github.com/Z4nzu/hackingtool.git cd hackingtool uv tool install . # installs the `hackingtool` executable on your PATH hackingtool Alternative: plain venv + pip (no PATH changes) bash git clone https://github.com/Z4nzu/hackingtool.git cd hackingtool python3 -m venv .venv && . .venv/bin/activate pip install . # or: pip install -e . for an editable dev install hackingtool The command is only on your PATH while that venv is activated. For developmentuv creates the virtualenv and installs everything from pyproject.toml / uv.lock in one step: bash git clone https://github.com/Z4nzu/hackingtool.git cd hackingtool uv sync uv run hackingtool No uv yet? pipx install uv (or see the uv install docs).Contributing? make setup wires the pre-push hook and make check runs the full gate (lint + tests + catalog validation). See CONTRIBUTING.md. Docker Pull and run the published image: bash docker run -it --rm hardikzinzu/hackingtool:latest Or build it locally from a checkout: bash git clone https://github.com/Z4nzu/hackingtool.git && cd hackingtool docker build -t hackingtool . docker run -it --rm hackingtool Optional runtimesSome individual tools need a language runtime to install/run; the core app doesn't.| Dependency | Version | Needed for | Go1.21+nuclei, ffuf, amass, httpx, katana, dalfox, gobuster, subfinderRubyanyhaiti, evil-winrmtmuxanybackground panes (/run … &, /panes, /attach)DockeranyMythic, MobSF (optional)---Quick CommandsLaunch hackingtool and type. There are only three kinds of input:| You type | It means | Example | /…a command you run/search subdomain@…a thing you name@nmap, @tag:osintanything elseplain English "what I want to do"crack a wifi handshake@ completes tool names — @tag: completes tags, / completes commands. Command reference| Command | Aliases | What it does | /run [args] [&]/openopen a tool's menu; with a trailing & it runs in a background tmux pane instead (that's where args are used)/search search tools by name, description or tag/tags list every tag with its tool count/ai /recommend, /rrecommend tools for a goal/goal AI-plan an objective and run it step by step, with per-step confirmation/find /discoverfind tools for a need — your catalog first, then GitHub (suggest-only)/panes/jobslist background panes/attach attach to the background session (Ctrl-b d to return)/kill kill one background pane, or all of them/config [key value] view/change settings; /config test checks the AI connection, /config github checks the GitHub token/skill show the operator playbook/update · /uninstall/removeupdate system packages or hackingtool · remove hackingtool and its tools/clear/clsclear the screen/back/bleave the current tool and go back/help/?, /hquick reference card/quit/q, /exitexit (also q, Ctrl-C, Ctrl-D)@ open a tool (case-insensitive, fuzzy fallback)@tag: list and pick from the tools carrying that tagInside a category: 1–N pick a tool · 97 install everything not yet installed ·98 archived tools · 99 back. Inside a tool: 1 install · 2 run · c ask for the exact command for your goal · 98 project page · 99 back. /help — the same card, in the app. On a non-interactive terminal (or without prompt_toolkit) hackingtool falls back to the classic numbered menu, where / or s searches, t filters by tag, r or a recommends, ? helps and q quits. Force it with hackingtool --classic.> New here? docs/HOW-TO-USE.md walks through each of these start to finish with numbered steps.---Features 🔎 /find — a tool for a need you don't have yetSearches the 215 curated tools first, then the GitHub search API, and ranks the results explainably. Suggest-only — it never clones, installs or runs anything — and it makes zero model calls. /find crack a wpa handshakeIn your toolbox (vetted) • aircrack-ng (WiFi security suite) • Kismet (wireless detector / WIDS) • Reaver (WPS PIN attack) • WiGLE (wardriving map & API) • hashcat example hashes (WPA mode 22000)Found on GitHub — NOT vetted by uswifiphisher/wifiphisher 14713★ GPL-3.0 The Rogue Access Point Framework 14713★ · trusted author (ships in our catalog) · active · matches: security, wifi git clone https://github.com/wifiphisher/wifiphisher … Press a to keep a result: it is saved to ~/.hackingtool/found.yaml as a "Discovered tools" entry — title, tags, description, link, and **no install or run command**, so a discovered entry can never execute anything. It shows up in your menu and in /search next launch.Out-of-scope asks (jamming, DoS, mass-targeting, malware) are refused **before any network call**, with an authorized alternative where one exists. Defensive/DFIR phrasing is never refused.Works anonymously at 10 GitHub searches/minute; a no-scope, no-permission token raises that to 30 — see /config github. 🎯 /goal — plan an objective, run it one step at a time /goal find live subdomains of example.com hackingtool drafts a short plan of real commands (with the reason for each step and an install hint for tools you don't have), asks you to confirm you are authorized to test the target, then walks the steps: [y] run · [s] skip · [e] edit · [q] abort. Every step runs list-form — never through a shell — and each goal gets a timestamped workspace under ~/.hackingtool/goals/ holding plan.json, a UTC-stamped run.log, and the raw output of each step.The model is called once, for planning; tool output is never fed back to it. With no model configured, /goal degrades to tool recommendations for the same objective. 🧠 Recommendations — say what you want in plain EnglishBare text (or /ai) maps intent to tools. The model may only return tags from the fixed taxonomy, and the catalog resolves tags → tools, so a tool can never be invented; with no model reachable a stdlib keyword matcher answers instead. /ai — pick one of the common tasks, or type the job in your own words. 🏷 Tags and search/tags prints every tag in use with its live tool count; @tag: opens the tools carrying it; /search matches names, descriptions and tags. /tags — 63 tags in use, with the number of tools behind each. ▶ Background panes (tmux)Long scans shouldn't block your console. With tmux installed, /run … & opens a labeled window in one detached hackingtool session: /run nmap -sV -oA scan 10.0.0.5 & ▶ started 'nmap' in background — /attach to view ` /panes lists them, /attach watches one (Ctrl-b d to come back), /kill ` or /kill all stops them, and the status line under the prompt shows ▶ N running. No tmux? It says so and opens the tool inline instead; disable it entirely with /config background_runner off. ⚙ Settings and the AI layer/config opens a full-screen settings editor (↑↓ move, ←→ change, Enter edit, t test the connection, Esc close); /config sets one key from the prompt. Settings live in ~/.hackingtool/config.json.The AI layer is opt-in and bring-your-own-key: an OpenAI-compatible endpoint when ai_base_url + an API key are set, else a local Ollama, else nothing — every feature degrades to a deterministic offline behaviour instead of guessing. Your API key is written only to ~/.hackingtool/.env (mode 600), never to config.json, and never printed back. /config test reports the real failure if a probe fails. 📋 Headless engagementsThe same catalog drives a non-interactive orchestrator that normalizes tool output into one findings.json: bash hackingtool --engagement acme --targets example.com --pipeline recon hackingtool --engagement acme --report # deterministic Markdown report hackingtool --engagement acme --ai-summary # opt-in triage of the REAL findings hackingtool --engagement acme --ai-report # opt-in narrative draft (report.draft.md) Out-of-scope targets are flagged and logged before anything runs, and the AI passes only ever summarize findings that exist.--- Documentation... {card-default label="📦 工具信息"} 🔗 项目地址:https://github.com/Z4nzu/hackingtool ⭐ Star数:79344 💻 开发语言:Python 📝 项目描述:面向黑客的一体化黑客工具 {/card-default} 总的来说,hackingtool是一个功能比较实用的开源工具,适合日常工作和学习使用。如果你正在寻找一款相关工具,不妨下载试试。使用前建议仔细阅读项目文档。 本文介绍的工具来源于GitHub开源社区,仅供学习交流使用,请遵守原项目开源协议。
-
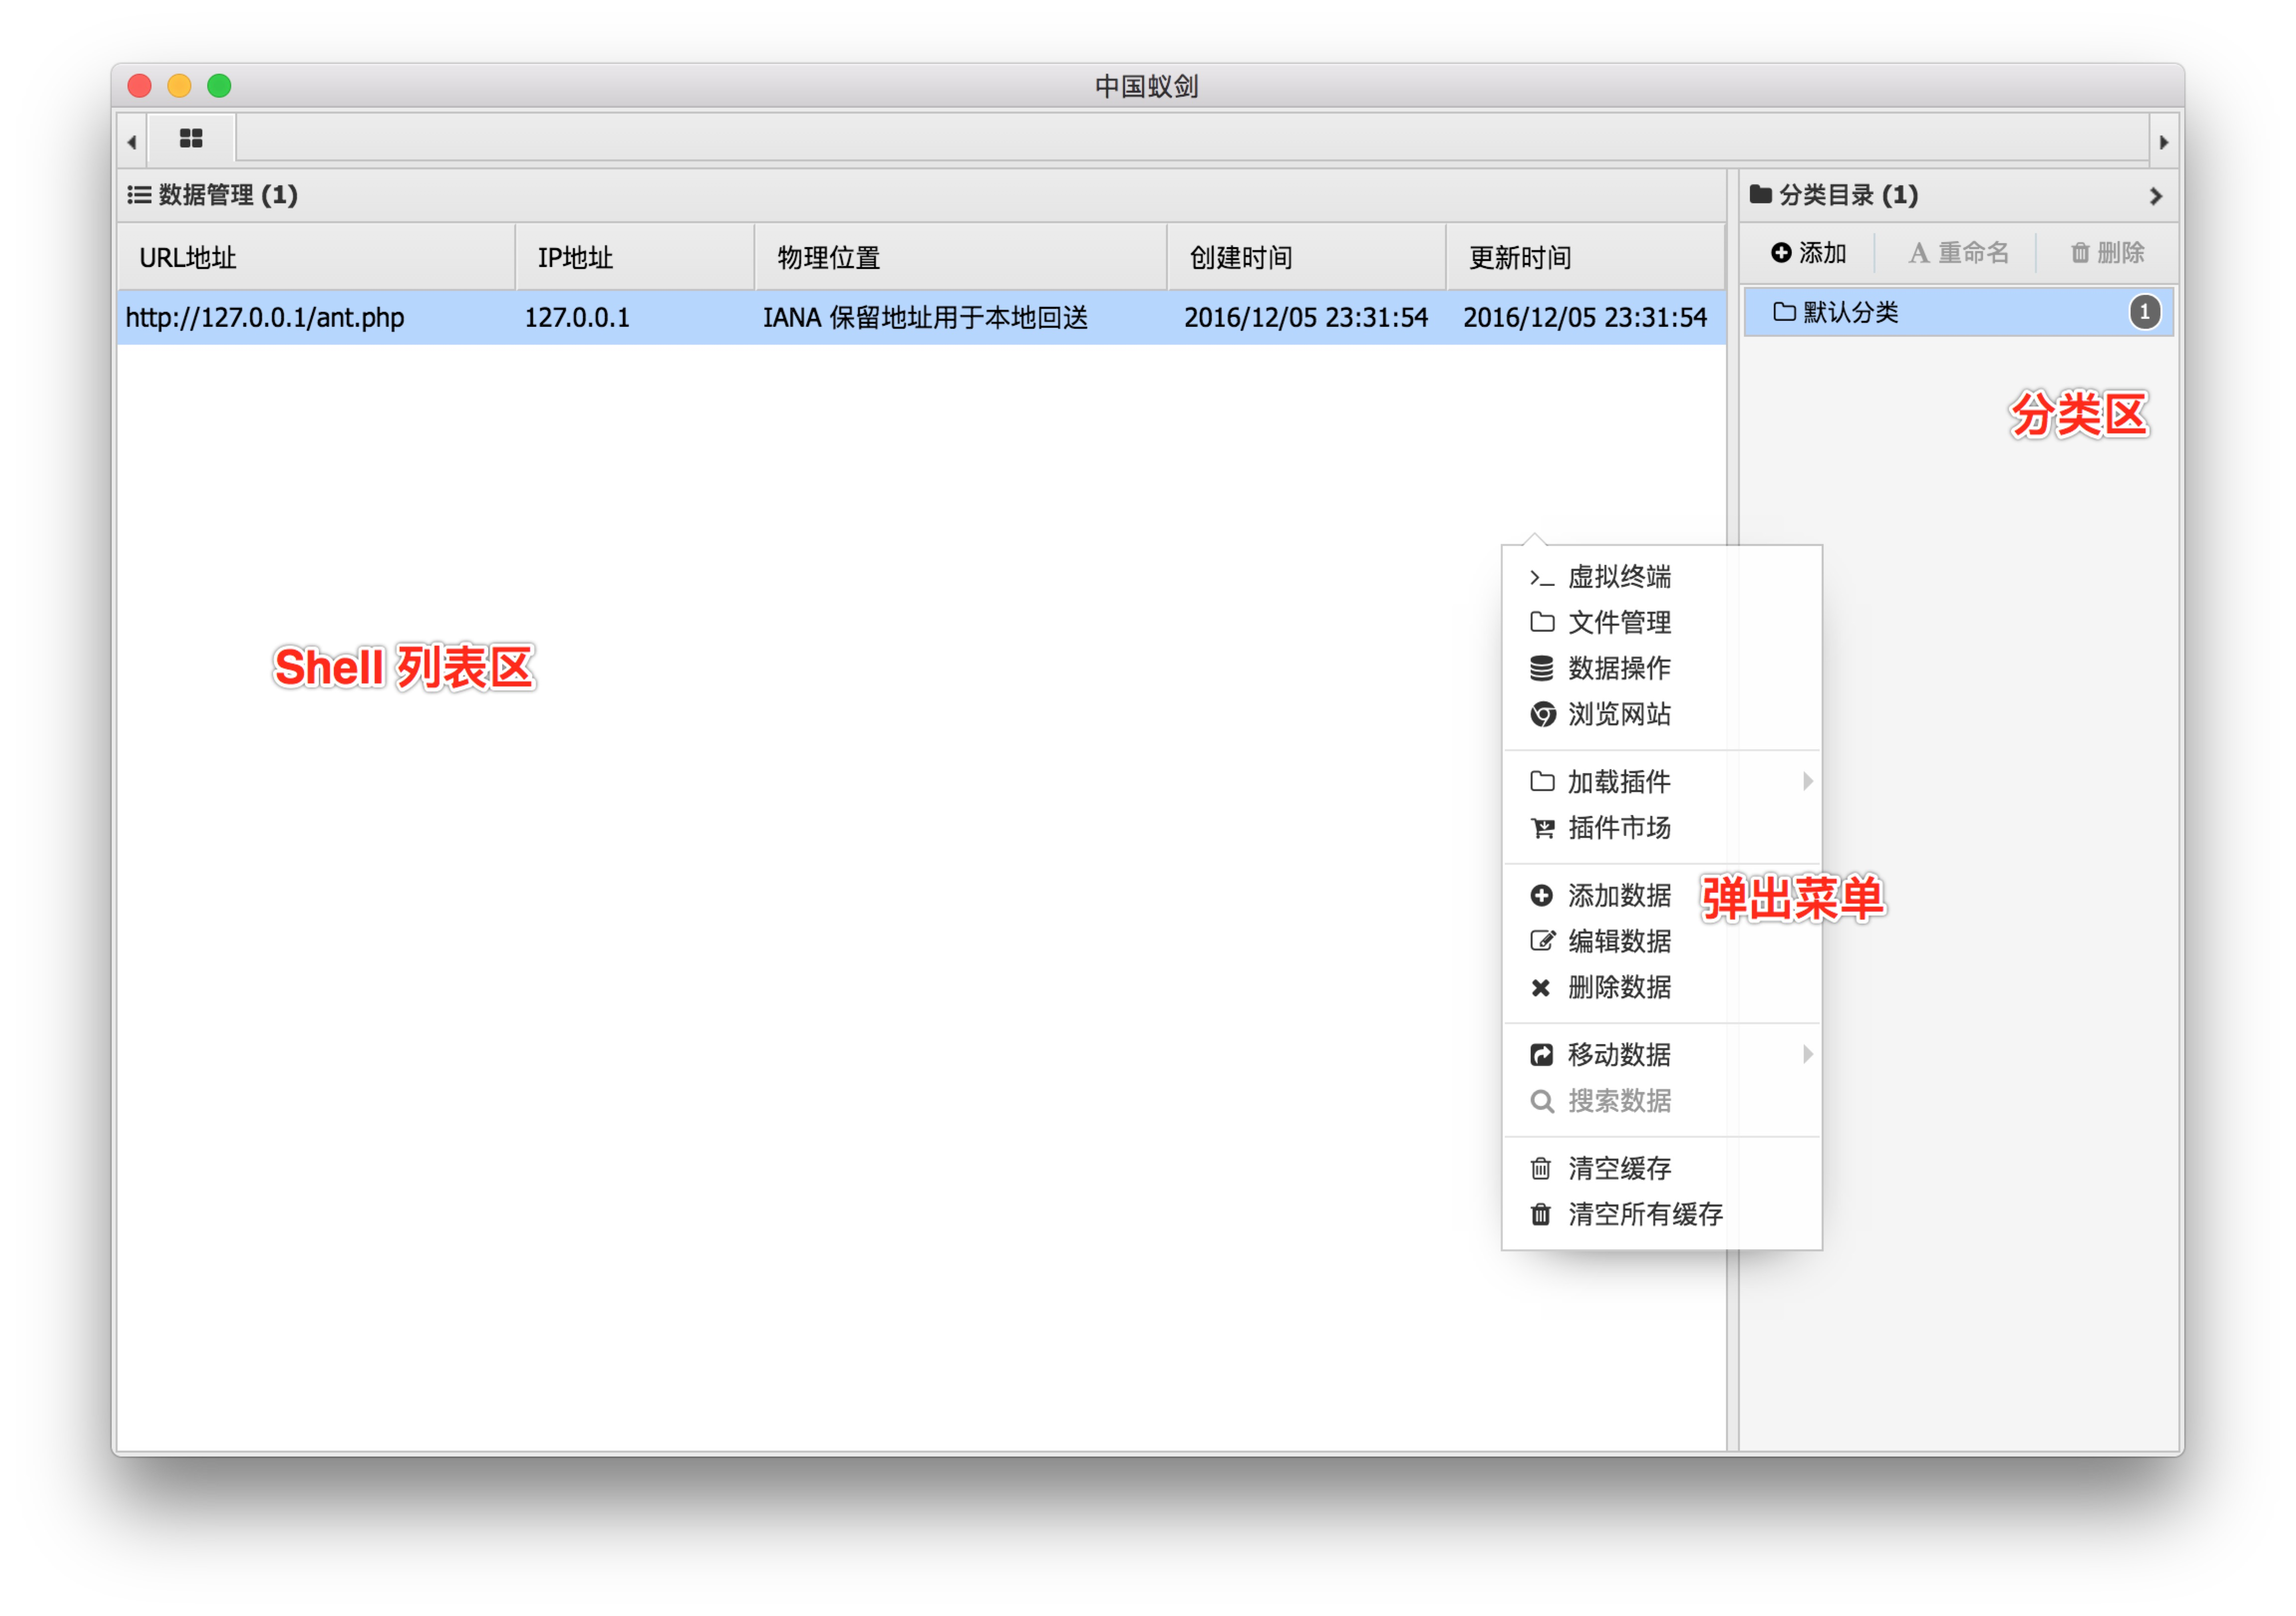
分享一个不错的绿色软件:antSword 在寻找好用的工具软件时,发现了antSword这个项目。它的定位是mirror https://github.com/AntSwordProject/antSword,目前在Gitee上已经积累了14个Star,更新也比较活跃,最后更新时间是2024年04月17日。下面来详细了解一下这个工具的功能特点。 工具功能介绍 AntSword in your hands, no worries in your mind!AntSword is an open source, cross-platform website administration tool, being designed to meet the needs of penetration testers together with security researchers with permissions and/or authorizations as well as webmasters. Anyone shall not use it for illegal purposes and profitability. Besides that, publishing unauthorized modified version is also prohibited, or otherwise bear legal responsibilities. This software, of which the development thought is modularization, is intended to provide easy-to-understand codes and modification guidelines for users of different levels. Therefore, any contribution making by everyone to this project is encouraged, whether large or small. By doing so, this tool can be more convenient and consequently become your most powerful kit! 中文说明 / Document / Changelog Development stack Electron ES6 dhtmlx Nodejs And other libraries called in the project. Screenshots 图片 More Screenshots 图片 图片 图片 图片 Quick Start See document: Quick Start Contribute See document: Make contributions to AntSword Thanks Thanks to anyone who made any contributions.Other 404StarLink 2.0 - Galaxy 图片 antSword has joined 404Team 404StarLink 2.0 - Galaxy LICENSE LICENSE 总的来说,antSword是一个功能比较实用的开源工具,适合日常工作和学习使用。如果你正在寻找一个mirror https://github.com/AntSwordProject/antSword的解决方案,不妨下载试试。使用前建议仔细阅读项目文档。 {card-default label="📦 工具信息"} 🔧 工具名称:antSword 👤 开发作者:medicean 📝 工具描述:mirror https://github.com/AntSwordProject/antSword 💻 开发语言:未知 📜 开源协议:未知开源协议 ⭐ Star数:14 | 🍴 Fork数:14 📅 更新时间:2024年04月17日 {/card-default} 本文介绍的工具来源于Gitee开源社区,仅供学习交流使用,请遵守原项目开源协议。
-
OneForAll 是什么?好用的工具软件推荐 今天给大家分享一款实用的开源工具——OneForAll。这个工具在Gitee上获得了158个Star,主要功能是OneForAll是一款功能强大的子域收集工具,对于需要提高工作效率的朋友来说是个不错的选择。 工具功能介绍 Build Status图片 👊OneForAll是一款功能强大的子域收集工具 📝English Document Example图片 🚀上手指南 📢 请务必花一点时间阅读此文档,有助于你快速熟悉OneForAll! 🐍安装要求 OneForAll基于Python 3.6.0开发和测试,OneForAll需要高于Python 3.6.0的版本才能运行。 安装Python环境可以参考Python 3 安装指南。运行以下命令检查Python和pip3版本: bash python -V pip3 -V 如果你看到类似以下的输出便说明Python环境没有问题: bash Python 3.6.0 pip 19.2.2 from C:\Users\shmilylty\AppData\Roaming\Python\Python36\site-packages\pip (python 3.6) ✔安装步骤(git 版) 下载 由于该项目处于开发中,会不断进行更新迭代,下载时请使用git clone克隆最新代码仓库,也方便后续的更新,不推荐从Releases下载,因为Releases里版本更新缓慢,也不方便更新, 本项目已经在码云(Gitee)镜像了一份,国内推荐使用码云进行克隆比较快: bash git clone https://gitee.com/shmilylty/OneForAll.git 或者: bash git clone https://github.com/shmilylty/OneForAll.git 安装 你可以通过pip3安装OneForAll的依赖,以下为Windows系统下使用pip3安装依赖的示例:注意:如果你的Python3安装在系统Program Files目录下,如:C:\Program Files\Python36,那么请以管理员身份运行命令提示符cmd执行以下命令! bash cd OneForAll/ python3 -m pip install -U pip setuptools wheel -i https://mirrors.aliyun.com/pypi/simple/ pip3 install -r requirements.txt -i https://mirrors.aliyun.com/pypi/simple/ python3 oneforall.py --help 其他系统平台的请参考依赖安装,如果在安装依赖过程中发现编译某个依赖库失败时可以参考常见问题与回答.md文档中解决方法,如果依然不能解决欢迎加群反馈问题。 更新 执行以下命令更新项目(可保存对/config/setting.py和/config/api.py的修改): bash git stash # 暂存本地的修改 git fetch --all # 拉取项目更新 git pull # 下载覆盖 git stash pop # 释放本地修改 ✔安装步骤(docker 版) 首先下载并编辑配置文件,添加自己的api和个性化设置,并保留原始文件结构 config ├── api.py ├── log.py └── setting.py 拉取镜像并执行,其中~/.config替换为你自己配置文件所在文件夹的路径 shell docker pull shmilylty/oneforall docker run -it --rm -v ~/results:/OneForAll/results -v ~/.config:/OneForAll/config shmilylty/oneforall --target example.com run 参数直接加在指令末尾,结果会输出在本地目录~/results,如需保存到其他位置,可以自行修改 ✨使用演示 如果你是通过pip3安装的依赖则使用以下命令运行示例: bash python3 oneforall.py --target example.com run python3 oneforall.py --targets ./example.txt run Example图片 🧐结果说明 我们以python3 oneforall.py --target example.com run命令为例,OneForAll在默认参数正常执行完毕会在results目录生成相应结果: Result图片 example.com.csv是每个主域下的子域收集结果。 all_subdomain_result_1583034493.csv是每次运行OneForAll收集到子域的汇总结果,包含example.com.csv,方便在批量收集场景中获取全部结果。 result.sqlite3是存放每次运行OneForAll收集到子域的SQLite3结果数据库,其数据库结构如下图: Database图片 其中类似example_com_origin_result表存放每个模块最初子域收集结果。 其中类似example_com_resolve_result表存放对子域进行解析后的结果。 其中类似example_com_last_result表存放上一次子域收集结果(需要收集两次以上才会生成)。 其中类似example_com_now_result表存放现在子域收集结果,一般情况关注这张表就可以了。 更多信息请参阅字段解释说明。 🤔使用帮助 命令行参数只提供了一些常用参数,更多详细的参数配置请见setting.py,如果你认为有些参数是命令界面经常使用到的或缺少了什么参数等问题非常欢迎反馈。由于众所周知的原因,如果要使用一些被墙的收集接口请先到setting.py配置代理,有些收集模块需要提供API(大多都是可以注册账号免费获取),如果需要使用请到api.py配置API信息,如果不使用请忽略有关报错提示。(详细模块请阅读收集模块说明) OneForAll命令行界面基于Fire实现,有关Fire更高级使用方法请参阅使用Fire CLI。 oneforall.py是主程序入口,oneforall.py可以调用brute.py,takerover.py及dbexport.py等模块,为了方便进行子域爆破独立出了brute.py,为了方便进行子域接管风险检查独立出了takerover.py,为了方便数据库导出独立出了dbexport.py,这些模块都可以单独运行,并且所接受参数要更丰富一点,如果要单独使用这些模块请参考使用帮助 ❗注意:当你在使用过程中遇到一些问题或者疑惑时,请先到Issues里使用搜索找找答案,还可以参阅常见问题与回答。 oneforall.py使用帮助 以下帮助信息可能不是最新的,你可以使用python oneforall.py --help获取最新的帮助信息。 bash python oneforall.py --help bash NAME oneforall.py - OneForAll帮助信息 SYNOPSIS oneforall.py COMMAND | --target=TARGET DESCRIPTION OneForAll是一款功能强大的子域收集工具 Example: python3 oneforall.py version python3 oneforall.py --target example.com run python3 oneforall.py --targets ./domains.txt run python3 oneforall.py --target example.com --valid None run python3 oneforall.py --target example.com --brute True run python3 oneforall.py --target example.com --port small run python3 oneforall.py --target example.com --fmt csv run python3 oneforall.py --target example.com --dns False run python3 oneforall.py --target example.com --req False run python3 oneforall.py --target example.com --takeover False run python3 oneforall.py --target example.com --show True run Note: 参数alive可选值True,False分别表示导出存活,全部子域结果 参数port可选值有'default', 'small', 'large', 详见config.py配置 参数fmt可选格式有 'csv','json' 参数path默认None使用OneForAll结果目录生成路径 ARGUMENTS TARGET 单个域名(二选一必需参数) TARGETS 每行一个域名的文件路径(二选一必需参数) FLAGS --brute=BRUTE s --dns=DNS DNS解析子域(默认True) --req=REQ HTTP请求子域(默认True) --port=PORT 请求验证子域的端口范围(默认只探测80端口) --valid=VALID 只导出存活的子域结果(默认False) --fmt=FMT 结果保存格式(默认csv) --path=PATH 结果保存路径(默认None) --takeover=TAKEOVER 检查子域接管(默认False) 🎉项目简介 项目地址:https://github.com/shmilylty/OneForAll 在渗透测试中信息收集的重要性不言而喻,子域收集是信息收集中必不可少且非常重要的一环,目前网上也开源了许多子域收集的工具,但是总是存在以下部分问题: 不够强大,子域收集的接口不够多,不能做到对批量子域自动收集,没有自动子域解析,验证,FUZZ以及信息拓展等功能。 不够友好,固然命令行模块比较方便,但是当可选的参数很多,要实现的操作复杂,用命令行模式就有点不够友好,如果有交互良好,高可操作的前端那么使用体验就会好很多。 缺少维护,很多工具几年没有更新过一次,issues和PR是啥,不存在的。 效率问题,没有利用多进程,多线程以及异步协程技术,速度较慢。 为了解决以上痛点,此项目应用而生,正如其名,我希望OneForAll是一款集百家之长,功能强大的全面快速子域收集终极神器🔨。 目前OneForAll还在开发中,肯定有不少问题和需要改进的地方,欢迎大佬们提交Issues和PR,用着还行给个小星星✨吧,目前有一个专门用于OneForAll交流和反馈 👍功能特性 收集能力强大,详细模块请阅读收集模块说明。 利用证书透明度收集子域(目前有6个模块:censys_api,certspotter,crtsh,entrust,google,spyse_api) 常规检查收集子域(目前有4个模块:域传送漏洞利用axfr,检查跨域策略文件cdx,检查HTTPS证书cert,检查内容安全策略csp,检查robots文件robots,检查sitemap文件sitemap,利用NSEC记录遍历DNS域dnssec,后续会添加NSEC3记录等模块) 利用网上爬虫档案收集子域(目前有2个模块:archivecrawl,commoncrawl,此模块还在调试,该模块还有待添加和完善) 利用DNS数据集收集子域(目前有24个模块:bevigil_api, binaryedge_api, bufferover, cebaidu, chinaz, chinaz_api, circl_api, cloudflare, dnsdb_api, dnsdumpster, hackertarget, ip138, ipv4info_api, netcraft, passivedns_api, ptrarchive, qianxun, rapiddns, riddler, robtex, securitytrails_api, sitedossier, threatcrowd, wzpc, ximcx) 利用DNS查询收集子域(目前有5个模块:通过枚举常见的SRV记录并做查询来收集子域srv,以及通过查询域名的DNS记录中的MX,NS,SOA,TXT记录来收集子域) 利用威胁情报平台数据收集子域(目前有6个模块:alienvault, riskiq_api,threatbook_api,threatminer,virustotal,virustotal_api该模块还有待添加和完善) 利用搜索引擎发现子域(目前有18个模块:ask, baidu, bing, bing_api, duckduckgo, exalead, fofa_api, gitee, github, github_api, google, google_api, shodan_api, so, sogou, yahoo, yandex, zoomeye_api),在搜索模块中除特殊搜索引擎,通用的搜索引擎都支持自动排除搜索,全量搜索,递归搜索。 支持子域爆破,该模块有常规的字典爆破,也有自定义的fuzz模式,支持批量爆破和递归爆破,自动判断泛解析并处理。 支持子域验证,默认开启子域验证,自动解析子域DNS,自动请求子域获取title和banner,并综合判断子域存活情况。 支持子域爬取,根据已有的子域,请求子域响应体以及响应体里的JS,从中再次发现新的子域。 支持子域置换,根据已有的子域,使用子域替换技术再次发现新的子域。 支持子域接管,默认开启子域接管风险检查,支持子域自动接管(目前只有Github,有待完善),支持批量检查。 处理功能强大,发现的子域结果支持自动去除,自动DNS解析,HTTP请求探测,自动筛选出有效子域,拓展子域的Banner信息,最终支持的导出格式有txt, csv, json。 速度极快,收集模块使用多线程调用,爆破模块使用massdns,DNS解析速度每秒可解析350000以上个域名,子域验证中DNS解析和HTTP请求使用异步多协程,多线程检查子域接管风险。 体验良好,各模块都有进度条,异步保存各模块结果。 如果你有其他很棒的想法请务必告诉我!😎 🌲目录结构 更多信息请参阅目录结构说明。 本项目docs目录下还提供了一些帮助与说明,如子域字典来源说明、泛解析判断流程。 👏用到框架 aiohttp - 异步http客户端/服务器框架 beautifulsoup4 - 可以轻松从HTML或XML文件中提取数据的Python库 fire - Python Fire是一个纯粹根据任何Python对象自动生成命令行界面(CLI)的库 loguru - 旨在带来愉快的日志记录Python库 massdns - 高性能的DNS解析器 records - Records是一个非常简单但功能强大的库,用于对大多数关系数据库进行最原始SQL查询。 requests - Requests 唯一的一个非转基因的 Python HTTP 库,人类可以安全享用。 tqdm - 适用于Python和CLI的快速,可扩展的进度条库 感谢这些伟大优秀的Python库! 🔖版本控制 该项目使用SemVer语言化版本格式进行版本管理,你可以参阅变更记录说明了解历史变更情况。 ⌛后续计划 [ ] 各模块持续优化和完善 [ ] 操作强大交互人性的前端界面实现 更多信息请参阅后续开发计划。 🙏贡献 非常热烈欢迎各位大佬一起完善本项目! 👨💻贡献者 Jing Ling 核心开发 你可以在贡献者文档中查看所有贡献者以及他们所做出的贡献,感谢他们让OneForAll变得更强大好用。 ☕赞赏 如果你觉得这个项目帮助到了你,你可以 📄版权 该项目签署了GPL-3.0授权许可,详情请参阅LICENSE。 😘鸣谢 感谢网上开源的各个子域收集项目! 感谢A-Team大哥们热情无私的问题解答! 📜免责声明 本工具仅能在取得足够合法授权的企业安全建设中使用,在使用本工具过程中,您应确保自己所有行为符合当地的法律法规。 如您在使用本工具的过程中存在任何非法行为,您将自行承担所有后果,本工具所有开发者和所有贡献者不承担任何法律及连带责任。 除非您已充分阅读、完全理解并接受本协议所有条款,否则,请您不要安装并使用本工具。 您的使用行为或者您以其他任何明示或者默示方式表示接受本协议的,即视为您已阅读并同意本协议的约束。 💖Star趋势 Stargazers over time图片 总的来说,OneForAll是一个功能比较实用的开源工具,适合日常工作和学习使用。如果你正在寻找一个OneForAll是一款功能强大的子域收集工具的解决方案,不妨下载试试。使用前建议仔细阅读项目文档。 {card-default label="📦 工具信息"} 🔧 工具名称:OneForAll 👤 开发作者:shmilylty 📝 工具描述:OneForAll是一款功能强大的子域收集工具 💻 开发语言:Python 📜 开源协议:未知开源协议 ⭐ Star数:158 | 🍴 Fork数:41 📅 更新时间:2026年08月28日 {/card-default} 本文介绍的工具来源于Gitee开源社区,仅供学习交流使用,请遵守原项目开源协议。
-
sectoolset 工具软件 功能特点与使用体验 今天给大家分享一款实用的开源工具——sectoolset。这个工具在Gitee上获得了33个Star,主要功能是安全项目工具集合 ,对于需要提高工作效率的朋友来说是个不错的选择。 工具功能介绍 sectoolset -- Github安全相关工具集合 主要内容: 0x00 漏洞利用实战练习&CTF安全竞赛 0x01 安全扫描器 0x02 安全防守 0x03 渗透测试 0x04 漏洞库及利用工具(POC,EXP) 0x05 二进制及代码分析工具 0x06 威胁情报&蜜罐 0x07 安全文档资料 0x10 AI&大模型安全 0x11 所有内容 乌云镜像 乌云镜像,已挂 乌云镜像,已挂 近期安全热点 金刚狼(Kimwolf)僵尸网络正通过机顶盒攻克你的内网 CVE-2025-48384: Git子模块回车符CR解析注入可致RCE GitHub MCP漏洞:劫持MCP服务访问私有仓库数据 glibc iconv()中的缓冲区溢出导致PHP RCE攻击CNEXT(CVE-2024-2961) 论文:红队中AI生成式模型使用调查 关于xz后门详解 ZenHammer:Rowhammer适用于AMD Zen的平台攻击 五眼联盟国家网络安全技术指导书 2018 Blackhat 工具集 Meltdown & Spectre License Licensed under Apache License 2.0. 综合来看,sectoolset在同类工具中还是有一定优势的,特别是在功能完整性和易用性方面表现不错。如果你有相关需求,可以下载试试。 {card-default label="📦 工具信息"} 🔧 工具名称:sectoolset 👤 开发作者:ijz 📝 工具描述:安全项目工具集合 💻 开发语言:Perl 📜 开源协议:未知开源协议 ⭐ Star数:33 | 🍴 Fork数:19 📅 更新时间:2026年04月16日 {/card-default} 本文介绍的工具来源于Gitee开源社区,仅供学习交流使用,请遵守原项目开源协议。
-
Osintgram 使用教程与功能详解 推荐一个实用的开源工具——Osintgram。项目由Datalux开发维护,GitHub上获得了 14305 个Star。简单来说,它是一款Osintgram是Instagram上的OSINT工具。它提供了一个交互式外壳,可以通过其昵称对任何用户的Instagram帐户进行分析,对于站长和开发者来说是个不错的工具。 工具功能介绍 Osintgram is an OSINT tool on Instagram to collect, analyze, and run reconnaissance. Disclaimer: FOR EDUCATIONAL PURPOSE ONLY! The contributors do not assume any responsibility for the use of this tool.$${\color{red}Warning:}$$ It is advisable to not use your own/primary account when using this tool.$${\color{red}Warning:}$$ If you fork the project and add your instagram credentials to you home repository do not upload them to github. You can disable uploading a certain file by adding it to ignore list. Tools and Commands 🧰Osintgram offers an interactive shell to perform analysis on Instagram account of any users by its nickname. You can get: text - addrs Get all registered addressed by target photos - captions Get user's photos captions - comments Get total comments of target's posts - followers Get target followers - followings Get users followed by target - fwersemail Get email of target followers - fwingsemail Get email of users followed by target - fwersnumber Get phone number of target followers - fwingsnumber Get phone number of users followed by target - hashtags Get hashtags used by target - info Get target info - likes Get total likes of target's posts - mediatype Get user's posts type (photo or video) - photodes Get description of target's photos - photos Download user's photos in output folder - propic Download user's profile picture - stories Download user's stories - tagged Get list of users tagged by target - wcommented Get a list of user who commented target's photos - wtagged Get a list of user who tagged target You can find detailed commands usage here.Latest version | Commands | CHANGELOG FAQ Can I access the contents of a private profile? No, you cannot get information on private profiles. You can only get information from a public profile or a profile you follow. The tools that claim to be successful are scams! What is and how I can bypass the challenge_required error? The challenge_required error means that Instagram notice a suspicious behavior on your profile, so needs to check if you are a real person or a bot. To avoid this you should follow the suggested link and complete the required operation (insert a code, confirm email, etc) Installation ⚙️1. Fork/Clone/Download this repogit clone https://github.com/Datalux/Osintgram.git2. Navigate to the directorycd Osintgram3. Create a virtual environment for this projectpython3 -m venv venv4. Load the virtual environment On Windows Powershell: .\venv\Scripts\activate.ps1 On Linux and Git Bash: source venv/bin/activate Run pip install -r requirements.txt6. Open the credentials.ini file in the config folder and write your Instagram account username and password in the corresponding fields. Or use hikerapi_token from https://hikerapi.com/tokens (first 100 requests are free after registration and confirmation of your tg)Alternatively, you can run the make setup command to populate this file for you.7. Run the main.py script in one of three ways* As an interactive prompt python3 main.py Or execute your command straight away python3 main.py --command Or execute using HikerAPI token via env HIKERAPI_TOKEN= python3 main.py -c Use Osintgram v2 (beta) You can use Osintgram2 beta just switching to v2 branch. The v2 has some improvements and is faster with a new command execution interface. Try it just running git checkout v2. Docker Quick Start 🐳This section will explain how you can quickly use this image with Docker or Docker-compose. Prerequisites Before you can use either Docker or Docker-compose, please ensure you do have the following prerequisites met.1. Docker installed - link Docker-composed installed (if using Docker-compose) - link Credentials configured - This can be done manually or by running the make setup command from the root of this repoImportant: Your container will fail if you do not do step #3 and configure your credentials Docker If docker is installed you can build an image and run this as a container.Build: bash docker build -t osintgram . Run: bash docker run --rm -it -v "$PWD/output:/home/osintgram/output" osintgram The `` is the Instagram account you wish to use as your target for recon. The required -i flag enables an interactive terminal to use commands within the container. docs The required -v flag mounts a volume between your local filesystem and the container to save to the ./output/ folder. docs The optional --rm flag removes the container filesystem on completion to prevent cruft build-up. docs The optional -t flag allocates a pseudo-TTY which allows colored output. docs Using docker-composeYou can use the docker-compose.yml file this single command: bash docker-compose run osintgram Where target is the Instagram target for recon.Alternatively, you may run docker-compose with the Makefile:make run - Builds and Runs with compose. Prompts for a target before running. Makefile (easy mode)For ease of use with Docker-compose, a Makefile has been provided.Here is a sample work flow to spin up a container and run osintgram with just two commands!1. make setup - Sets up your Instagram credentials make run - Builds and Runs a osintgram container and prompts for a targetSample workflow for development:1. make setup - Sets up your Instagram credentials make build-run-testing - Builds an Runs a container without invoking the main.py script. Useful for an it Docker session for development make cleanup-testing - Cleans up the testing container created from build-run-testing Development version 💻To use the development version with the latest feature and fixes just switch to development branch using Git:git checkout developmentand update to last version using:git pull origin development Updating ⬇️To update Osintgram with the stable release just pull the latest commit using Git.1. Make sure you are in the master branch running: git checkout master Download the latest version: git pull origin master Contributing 💡You can propose a feature request opening an issue or a pull request.Here is a list of Osintgram's contributors: External library 🔗Instagram API {card-default label="📦 工具信息"} 🔗 项目地址:https://github.com/Datalux/Osintgram ⭐ Star数:14305 💻 开发语言:Python 📝 项目描述:Osintgram是Instagram上的OSINT工具。它提供了一个交互式外壳,可以通过其昵称对任何用户的Instagram帐户进行分析 {/card-default} 总的来说,Osintgram是一个功能比较实用的开源工具,适合日常工作和学习使用。如果你正在寻找一款相关工具,不妨下载试试。使用前建议仔细阅读项目文档。 本文介绍的工具来源于GitHub开源社区,仅供学习交流使用,请遵守原项目开源协议。
-
深度评测:web-check 这款工具到底怎么样 推荐一个实用的开源工具——web-check。项目由lissy93开发维护,GitHub上获得了 34690 个Star。简单来说,它是一款用于分析任何网站的一🕵️♂️体化OSINT工具,对于站长和开发者来说是个不错的工具。 工具功能介绍 Web-Check Comprehensive, on-demand open source intelligence for any website 🌐 web-check.xyz---Kindly supported by: NinjaPear API to get a full B2B profiles from any URL Terminal Trove The $HOME of all things in the terminal Warp Built for coding with multiple AI agents About Screenshot Live Demo Mirror Features Usage Deployment Option#1: Netlify Option#2: Vercel Option#3: Docker Option#4: Render Option#5: Source Configuration Options Developer Setup Community Contributing Bugs Support License--- About Get an insight into the inner-workings of a given website: uncover potential attack vectors, analyse server architecture, view security configurations, and learn what technologies a site is using.Currently the dashboard will show: IP info, SSL chain, DNS records, cookies, headers, domain info, search crawl rules, page map, server location, redirect ledger, open ports, traceroute, DNS security extensions, site performance, trackers, associated hostnames, carbon footprint. Stay tuned, as I'll add more soon!The aim is to help you easily understand, optimize and secure your website. Screenshot Expand ScreenshotScreenshot图片Screenshot图片 Live DemoA hosted version can be accessed at: web-check.as93.net Mirror The source for this repo is mirrored to CodeBerg, available at: codeberg.org/alicia/web-check Status Build & Deploys: Repo Management & Miscellaneous: Features Click to expand / collapse sectionNote _this list needs updating, many more jobs have been added since..._The following section outlines the core features, and briefly explains why this data might be useful for you to know, as well as linking to further resources for learning more. IP Info Description An IP address (Internet Protocol address) is a numerical label assigned to each device connected to a network / the internet. The IP associated with a given domain can be found by querying the Domain Name System (DNS) for the domain's A (address) record. Use CasesFinding the IP of a given server is the first step to conducting further investigations, as it allows us to probe the server for additional info. Including creating a detailed map of a target's network infrastructure, pinpointing the physical location of a server, identifying the hosting service, and even discovering other domains that are hosted on the same IP address. Useful Links- Understanding IP Addresses IP Addresses - Wiki RFC-791 Internet Protocol whatismyipaddress.com SSL Chain DescriptionSSL certificates are digital certificates that authenticate the identity of a website or server, enable secure encrypted communication (HTTPS), and establish trust between clients and servers. A valid SSL certificate is required for a website to be able to use the HTTPS protocol, and encrypt user + site data in transit. SSL certificates are issued by Certificate Authorities (CAs), which are trusted third parties that verify the identity and legitimacy of the certificate holder. Use CasesSSL certificates not only provide the assurance that data transmission to and from the website is secure, but they also provide valuable OSINT data. Information from an SSL certificate can include the issuing authority, the domain name, its validity period, and sometimes even organization details. This can be useful for verifying the authenticity of a website, understanding its security setup, or even for discovering associated subdomains or other services. Useful Links- TLS - Wiki What is SSL (via Cloudflare learning) RFC-8446 - TLS SSL Checker DNS Records Description This task involves looking up the DNS records associated with a specific domain. DNS is a system that translates human-readable domain names into IP addresses that computers use to communicate. Various types of DNS records exist, including A (address), MX (mail exchange), NS (name server), CNAME (canonical name), and TXT (text), among others. Use CasesExtracting DNS records can provide a wealth of information in an OSINT investigation. For example, A and AAAA records can disclose IP addresses associated with a domain, potentially revealing the location of servers. MX records can give clues about a domain's email provider. TXT records are often used for various administrative purposes and can sometimes inadvertently leak internal information. Understanding a domain's DNS setup can also be useful in understanding how its online infrastructure is built and managed. Useful Links- What are DNS records? (via Cloudflare learning) DNS Record Types RFC-1035 - DNS DNS Lookup (via MxToolbox) Cookies Description The Cookies task involves examining the HTTP cookies set by the target website. Cookies are small pieces of data stored on the user's computer by the web browser while browsing a website. They hold a modest amount of data specific to a particular client and website, such as site preferences, the state of the user's session, or tracking information. Use CasesCookies can disclose information about how the website tracks and interacts with its users. For instance, session cookies can reveal how user sessions are managed, and tracking cookies can hint at what kind of tracking or analytics frameworks are being used. Additionally, examining cookie policies and practices can offer insights into the site's security settings and compliance with privacy regulations. Useful Links- HTTP Cookie Docs (Mozilla) What are Cookies (via Cloudflare Learning) Testing for Cookie Attributes (OWASP) RFC-6265 - Cookies Crawl Rules Description Robots.txt is a file found (usually) at the root of a domain, and is used to implement the Robots Exclusion Protocol (REP) to indicate which pages should be ignored by which crawlers and bots. It's good practice to avoid search engine crawlers from over-loading your site, but should not be used to keep pages out of search results (use the noindex meta tag or header instead). Use CasesIt's often useful to check the robots.txt file during an investigation, as it can sometimes disclose the directories and pages that the site owner doesn't want to be indexed, potentially because they contain sensitive information, or reveal the existence of otherwise hidden or unlinked directories. Additionally, understanding crawl rules may offer insights into a website's SEO strategies. Useful Links- Google Search Docs - Robots.txt Learn about robots.txt (via Moz.com) RFC-9309 - Robots Exclusion Protocol Robots.txt - wiki Headers Description The Headers task involves extracting and interpreting the HTTP headers sent by the target website during the request-response cycle. HTTP headers are key-value pairs sent at the start of an HTTP response, or before the actual data. Headers contain important directives for how to handle the data being transferred, including cache policies, content types, encoding, server information, security policies, and more. Use CasesAnalyzing HTTP headers can provide significant insights in an OSINT investigation. Headers can reveal specific server configurations, chosen technologies, caching directives, and various security settings. This information can help to determine a website's underlying technology stack, server-side security measures, potential vulnerabilities, and general operational practices. Useful Links- HTTP Headers - Docs RFC-7231 Section 7 - Headers List of header response fields OWASP Secure Headers Project Quality Metrics Description Using Lighthouse, the Quality Metrics task measures the performance, accessibility, best practices, and SEO of the target website. This returns a simple checklist of 100 core metrics, along with a score for each category, to gauge the overall quality of a given site. Use CasesUseful for assessing a site's technical health, SEO issues, identify vulnerabilities, and ensure compliance with standards. Useful Links- Lighthouse Docs Google Page Speed Tools W3 Accessibility Tools Google Search Console SEO Checker PWA Builder Server Location Description The Server Location task determines the physical location of the server hosting a given website based on its IP address. This is done by looking up the IP in a location database, which maps the IP to a lat + long of known data centers and ISPs. From the latitude and longitude, it's then possible to show additional contextual info, like a pin on the map, along with address, flag, time zone, currency, etc. Use CasesKnowing the server location is a good first step in better understanding a website. For site owners this aids in optimizing content delivery, ensuring compliance with data residency requirements, and identifying potential latency issues that may impact user experience in specific geographical regions. And for security researchers, it helps assess the risk posed by specific regions or jurisdictions regarding cyber threats and regulations. Useful Links- IP Locator Internet Geolocation - Wiki Associated Hosts Description This task involves identifying and listing all domains and subdomains (hostnames) that are associated with the website's primary domain. This process often involves DNS enumeration to discover any linked domains and hostnames, as well as looking at known DNS records. Use CasesDuring an investigation, understanding the full scope of a target's web presence is critical. Associated domains could lead to uncovering related projects, backup sites, development/test sites, or services linked to the main site. These can sometimes provide additional information or potential security vulnerabilities. A comprehensive list of associated domains and hostnames can also give an overview of the organization's structure and online footprint. Useful Links- DNS Enumeration - Wiki OWASP - Enumerate Applications on Webserver DNS Enumeration - DNS Dumpster Subdomain Finder Redirect Chain Description This task traces the sequence of HTTP redirects that occur from the original URL to the final destination URL. An HTTP redirect is a response with a status code that advises the client to go to another URL. Redirects can occur for several reasons, such as URL normalization (directing to the www version of the site), enforcing HTTPS, URL shorteners, or forwarding users to a new site location. Use CasesUnderstanding the redirect chain can be useful for several reasons. From a security perspective, long or complicated redirect chains can be a sign of potential security risks, such as unencrypted redirects in the chain. Additionally, redirects can impact website performance and SEO, as each redirect introduces additional round-trip-time (RTT). For OSINT, understanding the redirect chain can help identify relationships between different domains or reveal the use of certain technologies or hosting providers. Useful Links- HTTP Redirects - MDN URL Redirection - Wiki 301 Redirects explained TXT Records DescriptionTXT records are a type of DNS record that provides text information to sources outside your domain. They can be used for a variety of purposes, such as verifying domain ownership, ensuring email security, and even preventing unauthorized changes to your website. Use CasesThe TXT records often reveal which external services and technologies are being used with a given domain. They may reveal details about the domain's email configuration, the use of specific services like Google Workspace or Microsoft 365, or security measures in place such as SPF and DKIM. Understanding these details can give an insight into the technologies used by the organization, their email security practices, and potential vulnerabilities. Useful Links- TXT Records (via Cloudflare Learning) TXT Records - Wiki RFC-1464 - TXT Records TXT Record Lookup (via MxToolbox) Server Status Description Checks if a server is online and responding to requests... {card-default label="📦 工具信息"} 🔗 项目地址:https://github.com/lissy93/web-check ⭐ Star数:34690 💻 开发语言:TypeScript 📝 项目描述:用于分析任何网站的一🕵️♂️体化OSINT工具 {/card-default} 总的来说,web-check是一个功能比较实用的开源工具,适合日常工作和学习使用。如果你正在寻找一款相关工具,不妨下载试试。使用前建议仔细阅读项目文档。 本文介绍的工具来源于GitHub开源社区,仅供学习交流使用,请遵守原项目开源协议。
-
安全圈热门工具 sqlmap 体验分享 推荐一个实用的开源工具——sqlmap。项目由sqlmapproject开发维护,GitHub上获得了 38375 个Star。简单来说,它是一款自动SQL注入和数据库接管工具,对于站长和开发者来说是个不错的工具。 工具功能介绍 sqlmap is an open source penetration testing tool that automates the process of detecting and exploiting SQL injection flaws and taking over of database servers. It comes with a powerful detection engine, many niche features for the ultimate penetration tester, and a broad range of switches including database fingerprinting, over data fetching from the database, accessing the underlying file system, and executing commands on the operating system via out-of-band connections.Screenshots ----Screenshot图片You can visit the collection of screenshots demonstrating some of the features on the wiki.Installation ----You can download the latest tarball by clicking here or latest zipball by clicking here.Preferably, you can download sqlmap by cloning the Git repository:git clone --depth 1 https://github.com/sqlmapproject/sqlmap.git sqlmap-devsqlmap works out of the box with Python version 2.7 and 3.x on any platform.Usage ----To get a list of basic options and switches use:python sqlmap.py -hTo get a list of all options and switches use:python sqlmap.py -hhYou can find a sample run here. To get an overview of sqlmap capabilities, a list of supported features, and a description of all options and switches, along with examples, you are advised to consult the user's manual.Links ----* Homepage: https://sqlmap.org Download: .tar.gz or .zip Commits RSS feed: https://github.com/sqlmapproject/sqlmap/commits/master.atom Issue tracker: https://github.com/sqlmapproject/sqlmap/issues User's manual: https://github.com/sqlmapproject/sqlmap/wiki Frequently Asked Questions (FAQ): https://github.com/sqlmapproject/sqlmap/wiki/FAQ X: @sqlmap Demos: https://www.youtube.com/user/inquisb/videos Playground: https://sekumart.sekuripy.hr Research: https://www.sekuripy.hr/labs/sqlmap/#research Screenshots: https://github.com/sqlmapproject/sqlmap/wiki/ScreenshotsTranslations ----* Arabic Bengali Bulgarian Chinese Croatian Dutch French Georgian German Greek Hindi Indonesian Italian Japanese Korean Kurdish (Central) Persian Polish Portuguese Russian Serbian Slovak Spanish Turkish Ukrainian Vietnamese {card-default label="📦 工具信息"} 🔗 项目地址:https://github.com/sqlmapproject/sqlmap ⭐ Star数:38375 💻 开发语言:Python 📝 项目描述:自动SQL注入和数据库接管工具 {/card-default} 总的来说,sqlmap是一个功能比较实用的开源工具,适合日常工作和学习使用。如果你正在寻找一款相关工具,不妨下载试试。使用前建议仔细阅读项目文档。 本文介绍的工具来源于GitHub开源社区,仅供学习交流使用,请遵守原项目开源协议。
-
精选开源工具:thc-hydra 推荐 推荐一个实用的开源工具——thc-hydra。项目由vanhauser-thc开发维护,GitHub上获得了 12244 个Star。简单来说,它是一款九头蛇,对于站长和开发者来说是个不错的工具。 工具功能介绍 H Y D R A(c) 2001-2023 by van Hauser / THC https://github.com/vanhauser-thc/thc-hydra Many modules were written by David (dot) Maciejak @ gmail (dot) com BFG code by Jan Dlabal Licensed under AGPLv3 (see LICENSE file)Please do not use in military or secret service organizations, or for illegal purposes. (This is the wish of the author and non-binding. Many people working in these organizations do not care for laws and ethics anyway. You are not one of the "good" ones if you ignore this.)NOTE: No, this is not meant to be a markdown doc! old school!Hydra in the most current GitHub state can be directly downloaded via Docker: docker pull vanhauser/hydra INTRODUCTION Number one of the biggest security holes are passwords, as every password security study shows. This tool is a proof-of-concept code to give researchers and security consultants the possibility of showing how easy it would be to gain unauthorized access from a remote to a system.THIS TOOL IS FOR LEGAL PURPOSES ONLY!There are already several login hacker tools available; however, none of them support more than one protocol to attack or support parallelized connects.It was tested to compile cleanly on Linux, Windows/Cygwin, Solaris, FreeBSD/OpenBSD, QNX (Blackberry 10), and MacOS.Currently, this tool supports the following protocols: Asterisk, AFP, Cisco AAA, Cisco auth, Cisco enable, CVS, Firebird, FTP, HTTP-FORM-GET, HTTP-FORM-POST, HTTP-GET, HTTP-HEAD, HTTP-POST, HTTP-PROXY, HTTPS-FORM-GET, HTTPS-FORM-POST, HTTPS-GET, HTTPS-HEAD, HTTPS-POST, HTTP-Proxy, ICQ, IMAP, IRC, LDAP, MEMCACHED, MONGODB, MS-SQL, MYSQL, NCP, NNTP, Oracle Listener, Oracle SID, Oracle, PC-Anywhere, PCNFS, POP3, POSTGRES, Radmin, RDP, Rexec, Rlogin, Rsh, RTSP, SAP/R3, SIP, SMB, SMTP, SMTP Enum, SNMP v1+v2+v3, SOCKS5, SSH (v1 and v2), SSHKEY, Subversion, Teamspeak (TS2), Telnet, VMware-Auth, VNC and XMPP.However, the module engine for new services is very easy, so it won't take a long time until even more services are supported. Your help in writing, enhancing, or fixing modules is highly appreciated!! :-)WHERE TO GET You can always find the newest release/production version of Hydra at its project page at https://github.com/vanhauser-thc/thc-hydra/releases If you are interested in the current development state, the public development repository is on GitHub: svn co https://github.com/vanhauser-thc/thc-hydra or git clone https://github.com/vanhauser-thc/thc-hydra Use the development version at your own risk. It contains new features and new bugs. Things might not work!Alternatively (and easier), you can pull it as a Docker container: docker pull vanhauser/hydra HOW TO COMPILE To configure, compile, and install Hydra, just type: ./configure make make install If you want the SSH module, you have to set up libssh (not libssh2!) on your system, get it from https://www.libssh.org, for ssh v1 support you also need to add the "-DWITH_SSH1=On" option in the cmake command line. IMPORTANT: If you compile on macOS, you must do this - do not install libssh via Homebrew.If you use Ubuntu/Debian, this will install the supplementary libraries needed for a few optional modules (note that some might not be available on your distribution): apt-get install libssl-dev libssh-dev libidn11-dev libpcre3-dev \ libgtk-3-dev libmysqlclient-dev libpq-dev libsvn-dev \ firebird-dev libmemcached-dev libgpg-error-dev \ libgcrypt11-dev libgcrypt20-dev freetds-dev This enables all optional modules and features except for Oracle, SAP R/3, NCP, and the Apple filing protocol - which you will need to download and install from the vendor's websites.For all other Linux derivatives and BSD-based systems, use the system software installer and look for similarly named libraries, like in the command above. In all other cases, you have to download all source libraries and compile them manually.SUPPORTED PLATFORMS All UNIX platforms (Linux, *BSD, Solaris, etc.) MacOS (basically a BSD clone) Windows with Cygwin (both IPv4 and IPv6) Mobile systems based on Linux, MacOS, or QNX (e.g. Android, iPhone, Blackberry 10, Zaurus, iPaq)HOW TO USE If you just enter hydra, you will see a short summary of the important options available. Type ./hydra -h to see all available command line options.Note that NO login/password file is included. Generate them yourself. A default password list is, however, present; use "dpl4hydra.sh" to generate a list.For Linux users, a GTK GUI is available; try ./xhydraFor the command line usage, the syntax is as follows: For attacking one target or a network, you can use the new "://" style: hydra [some command line options] PROTOCOL://TARGET:PORT/MODULE-OPTIONS The old mode can be used for these, too, and additionally, if you want to specify your targets from a text file; you must use this one: hydra [some command line options] [-s PORT] TARGET PROTOCOL [MODULE-OPTIONS] Via the command line options, you specify which logins to try, which passwords, if SSL should be used, how many parallel tasks should be used for attacking, etc.PROTOCOL is the protocol you want to use for attacking, e.g., ftp, SMTP, http-get or many others are available TARGET is the target you want to attack MODULE-OPTIONS are optional values that are special per PROTOCOL moduleFIRST - select your target You have three options on how to specify the target you want to attack: A single target on the command line: just put the IP or DNS address in A network range on the command line: CIDR specification like "192.168.0.0/24" A list of hosts in a text file: one line per entry (see below)SECOND - select your protocol Try to avoid telnet, as it is unreliable for detecting a correct or false login attempt. Use a port scanner to see which protocols are enabled on the target.THIRD - check if the module has optional parameters hydra -U PROTOCOL e.g. hydra -U smtpFOURTH - the destination port This is optional; if no port is supplied, the default common port for the PROTOCOL is used. If you specify SSL to use ("-S" option), the SSL common port is used by default.If you use "://" notation, you must use "[" "]" brackets if you want to supply IPv6 addresses or CIDR ("192.168.0.0/24") notations to attack: hydra [some command line options] ftp://[192.168.0.0/24]/ hydra [some command line options] -6 smtps://[2001:db8::1]/NTLMNote that everything Hydra does is IPv4 only! If you want to attack IPv6 addresses, you must add the "-6" command line option. All attacks are then IPv6 only!If you want to supply your targets via a text file, you can not use the :// notation, but use the old style and just supply the protocol (and module options): hydra [some command line options] -M targets.txt ftp You can also supply the port for each target entry by adding ":" after a target entry in the file, e.g.: foo.bar.com target.com:21 unusual.port.com:2121 default.used.here.com 127.0.0.1 127.0.0.1:2121 Note that if you want to attach IPv6 targets, you must supply the -6 option and must put IPv6 addresses in brackets in the file(!) like this: foo.bar.com target.com:21 [fe80::1%eth0] [2001::1] [2002::2]:8080 [2a01:24a:133:0:00:123:ff:1a] LOGINS AND PASSWORDS You have many options on how to attack with logins and passwords With -l for login and -p for password, you tell Hydra that this is the only login and/or password to try. With -L for logins and -P for passwords, you supply text files with entries. e.g.: hydra -l admin -p password ftp://localhost/ hydra -L default_logins.txt -p test ftp://localhost/ hydra -l admin -P common_passwords.txt ftp://localhost/ hydra -L logins.txt -P passwords.txt ftp://localhost/ Additionally, you can try passwords based on the login via the "-e" option. The "-e" option has three parameters: s - try the login as password n - try an empty password r - reverse the login and try it as a password If you want to, e.g., try "try login as password and "empty password", you specify "-e sn" on the command line.But there are two more modes for trying passwords than -p/-P: You can use a text file where a login and password pair is separated by a colon, e.g.: admin:password test:test foo:bar This is a common default account style listing that is also generated by the dpl4hydra.sh default account file generator supplied with Hydra. You use such a text file with the -C option - note that in this mode you can not use -l/-L/-p/-P options (-e nsr however you can). Example: hydra -C default_accounts.txt ftp://localhost/ And finally, there is a brute-force mode with the -x option (which you can not use with -p/-P/-C): -x minimum_length:maximum_length:charset The charset definition is a for lowercase letters, A for uppercase letters, 1 for numbers and for anything else, what you supply is their real representation. Examples: -x 1:3:a generate passwords from length 1 to 3 with all lowercase letters -x 2:5:/ generate passwords from length 2 to 5 containing only slashes -x 5:8:A1 generate passwords from length 5 to 8 with uppercase and numbers -x '3:3:aA1&~#\\ "\'$%*?./§,;:!`' -v generates length 3 passwords with all 95 characters, and verbose. Example: hydra -l ftp -x 3:3:a ftp://localhost/ SPECIAL OPTIONS FOR MODULES Via the third command line parameter (TARGET SERVICE OPTIONAL) or the -m command line option, you can pass one option to a module. Many modules use this; a few require it!To see the special option of a module, type:hydra -U e.g../hydra -U http-post-formThe special options can be passed via the -m parameter, as 3rd command line option or in the service://target/option format.Examples (they are all equal): ./hydra -l test -p test -m PLAIN 127.0.0.1 imap ./hydra -l test -p test 127.0.0.1 imap PLAIN ./hydra -l test -p test imap://127.0.0.1/PLAIN RESTORING AN ABORTED/CRASHED SESSION When Hydra is aborted with Control-C, killed, or crashes, it leaves a "hydra.restore" file behind, which contains all necessary information to restore the session. This session file is written every 5 minutes. NOTE: the hydra.restore file can NOT be copied to a different platform (e.g. from little endian to big endian, or from Solaris to AIX)HOW TO SCAN/CRACK OVER A PROXY The environment variable HYDRA_PROXY_HTTP defines the web proxy (this works just for the HTTP services!). The following syntax is valid: HYDRA_PROXY_HTTP="http://123.45.67.89:8080/" HYDRA_PROXY_HTTP="http://login:password@123.45.67.89:8080/" HYDRA_PROXY_HTTP="proxylist.txt" The last example is a text file containing up to 64 proxies (in the same format definition as the other examples).For all other services, use the HYDRA_PROXY variable to scan/crack. It uses the same syntax. eg: HYDRA_PROXY=[connect|socks4|socks5]://[login:password@]proxy_addr:proxy_port for example: HYDRA_PROXY=connect://proxy.anonymizer.com:8000 HYDRA_PROXY=socks4://auth:pw@127.0.0.1:1080 HYDRA_PROXY=socksproxylist.txt ADDITIONAL HINTS Sort your password files by likelihood and use the -u option to find passwords much faster! uniq your dictionary files! This can save you a lot of time :-) cat words.txt | sort | uniq > dictionary.txt If you know that the target is using a password policy (allowing users only to choose a password with a minimum length of 6, containing at least one letter and one number, etc. use the tool pw-inspector, which comes along with the hydra package, to reduce the password list: cat dictionary.txt | pw-inspector -m 6 -c 2 -n > passlist.txtRESULTS OUTPUT --------------The results are output to stdio along with the other information. Via the -o command line option, the results can also be written to a file. Using -b, the format of the output can be specified. Currently, these are supported:* text - plain text format jsonv1 - JSON data using version 1.x of the schema (defined below). json - JSON data using the latest version of the schema; currently, there is only version 1.If using JSON output, the results file may not be valid JSON if there are serious errors in booting Hydra.JSON Schema Here is an example of the JSON output. Notes on some of the fields:* errormessages - an array of zero or more strings that are normally printed to stderr at the end of Hydra's run. The text is very free-form. success - indication if Hydra ran correctly without error (NOT if passwords were detected). This parameter is either the JSON value true or false depending on completion. quantityfound - How many username+password combinations were discovered. jsonoutputversion - Version of the schema, 1.00, 1.01, 1.11, 2.00, 2.03, etc. Hydra will make the second tuple of the version to always be two digits to make it easier for downstream processors (as opposed to v1.1 vs v1.10). The minor-level versions are additive, so 1.02 will contain more fields than version 1.00 and will be backward compatible. Version 2.x will break something from the version 1.x output.Version 1.00 example: { "errormessages": [ "[ERROR] Error Message of Something", "[ERROR] Another Message", "These are very free form" ], "generator": { "built": "2021-03-01 14:44:22", "commandline": "hydra -b jsonv1 -o results.json ... ...", "jsonoutputversion": "1.00", "server": "127.0.0.1", "service": "http-post-form", "software": "Hydra", "version": "v8.5" }, "quantityfound": 2, "results": [ { "host": "127.0.0.1", "login": "bill@example.com", "password": "bill", "port": 9999, "service": "http-post-form" }, { "host": "127.0.0.1", "login": "joe@example.com", "password": "joe", "port": 9999, "service": "http-post-form" } ], "success": false } SPEED Through the parallelizing feature, this password cracker tool can be very fast; however, it depends on the protocol. The fastest are generally POP3 and FTP. Experiment with the task option (-t) to speed things up! The higher - the faster ;-) (but too high - and it disables the service)STATISTICS Run against a SuSE Linux 7.2 on localhost with a "-C FILE" containing 295 entries (294 tries invalid logins, 1 valid). Every test was run three times (only for "1 task" just once), and the average was noted down. P A R A L L E L T A S K S SERVICE 1 4 8 16 32 50 64 100 128 ------- -------------------------------------------------------------------- telnet 23:20 5:58 2:58 1:34 1:05 0:33 0:45* 0:25* 0:55* ftp 45:54 11:51 5:54 3:06 1:25 0:58 0:46 0:29 0:32 pop3 92:10 27:16 13:56 6:42 2:55 1:57 1:24 1:14 0:50 imap 31:05 7:41 3:51 1:58 1:01 0:39 0:32 0:25 0:21 (*) Note: telnet timings can be VERY different for 64 to 128 tasks! e.g. with 128 tasks, running four times, resulted in timings between 28 and 97 seconds! The reason for this is unknown...guesses per task (rounded up):295 74 38 19 10 6 5 3 3guesses possible per connect ... {card-default label="📦 工具信息"} 🔗 项目地址:https://github.com/vanhauser-thc/thc-hydra ⭐ Star数:12244 💻 开发语言:C 📝 项目描述:九头蛇 {/card-default} 总的来说,thc-hydra是一个功能比较实用的开源工具,适合日常工作和学习使用。如果你正在寻找一款相关工具,不妨下载试试。使用前建议仔细阅读项目文档。 本文介绍的工具来源于GitHub开源社区,仅供学习交流使用,请遵守原项目开源协议。
-
网络安全工具 dirsearch 实战分享 推荐一个实用的开源工具——dirsearch。项目由maurosoria开发维护,GitHub上获得了 14697 个Star。简单来说,它是一款Web路径扫描仪,对于站长和开发者来说是个不错的工具。 工具功能介绍 Build图片 License图片 Stars图片> An advanced web path brute-forcerdirsearch is being actively developed by @maurosoria and @shelld3v.Join the Discord server to communicate with the team. Quick Startdirsearch requires Python 3.11 or higher. sh git clone https://github.com/maurosoria/dirsearch.git --depth 1 cd dirsearch python3 dirsearch.py -u https://example.com -e php,html,js You can also install the latest Python stack directly from GitHub with pip: sh pip3 install git+https://github.com/maurosoria/dirsearch.git dirsearch -u https://example.com -e php,html,js The Rust native backend is opt-in for source installs; see Installation for the native build steps.Pre-built PyInstaller binaries and portable folder archives are available on the Releases page. Documentation The full documentation now lives in docs/:- Installation: supported platforms, Python install, release artifacts, and Docker. Usage Guide: common scans, recursion, filters, proxies, raw requests, reports, and tips. Wordlists: %EXT%, categories, templates, prefixes, suffixes, and transformations. CLI Options: complete command-line reference. Configuration: config.ini reference. Sessions: save, list, and resume scan sessions. Python API: importable API examples. Building: PyInstaller, portable builds, Docker images, and GitHub Actions. References: external tutorials and articles. Minimal Examples sh python3 dirsearch.py -u https://target python3 dirsearch.py -u https://target -e php,html,js python3 dirsearch.py -u https://target -e php,html,js -w /path/to/wordlist python3 dirsearch.py -u https://target -r --max-recursion-depth 3 Use python3 dirsearch.py -h for common options or python3 dirsearch.py -hh for the complete CLI help. Python APIdirsearch can also be used from Python code for local automation, MCP servers, REST wrappers, and agent-controlled scans. The importable API keeps its configuration in FuzzerConfig, so callers do not need to parse CLI flags or mutate CLI globals.See Python API for examples covering templates, custom wordlists, callbacks, authenticated sessions, and agent-oriented scan recipes. Contributing Pull requests and feature requests are welcome. See CONTRIBUTORS.md for the people who have helped improve dirsearch. License Copyright (C) Mauro Soria (maurosoria@gmail.com)License: GNU General Public License, version 2. {card-default label="📦 工具信息"} 🔗 项目地址:https://github.com/maurosoria/dirsearch ⭐ Star数:14697 💻 开发语言:Python 📝 项目描述:Web路径扫描仪 {/card-default} 总的来说,dirsearch是一个功能比较实用的开源工具,适合日常工作和学习使用。如果你正在寻找一款相关工具,不妨下载试试。使用前建议仔细阅读项目文档。 本文介绍的工具来源于GitHub开源社区,仅供学习交流使用,请遵守原项目开源协议。
-
免费开源绿色软件推荐:fuzzdb-collect 下载 推荐一个实用的开源工具——fuzzdb-collect。项目由euphratica开发维护,采用未知开源协议发布。简单来说,它是一个网络上安全资源的搜集,对于站长和开发者来说是个不错的工具。 工具功能介绍 项目简介 Scanners Box是一个集合github平台上的安全行业从业者自研开源扫描器的仓库,包括子域名枚举、数据库漏洞扫描、弱口令或信息泄漏扫描、端口扫描、指纹识别以及其他大型扫描器或模块化扫描器,同时该仓库只收录各位网友自己编写的一般性开源扫描器,类似awvs、nmap、w3af等知名扫描工具不收录。 恶意软件 https://github.com/deadPix3l/CryptSky/ (勒索软件) DDOS防护 https://github.com/ywjt/Dshield waf开源及规则 https://github.com/SpiderLabs/ModSecurity https://github.com/xsec-lab/x-waf https://github.com/loveshell/ngx_lua_waf https://github.com/SpiderLabs/owasp-modsecurity-crs/tree/master/base_rules 入门指南 https://wizardforcel.gitbooks.io/web-hacking-101/content/ Web Hacking 101 中文版 https://wizardforcel.gitbooks.io/asani/content/ 浅入浅出Android安全 中文版 https://wizardforcel.gitbooks.io/lpad/content/ Android 渗透测试学习手册 中文版 https://wizardforcel.gitbooks.io/kali-linux-web-pentest-cookbook/content/ Kali Linux Web渗透测试秘籍 中文版 https://github.com/hardenedlinux/linux-exploit-development-tutorial Linux exploit 开发入门 https://www.gitbook.com/book/t0data/burpsuite/details burpsuite实战指南 http://www.kanxue.com/?article-read-1108.htm=&winzoom=1 渗透测试Node.js应用 https://github.com/qazbnm456/awesome-web-security Web安全资料和资源列表 https://sec-wiki.com/ sec-wiki安全维基百科 fuzz工具收集 https://github.com/ivanfratric/winafl https://github.com/attekett/NodeFuzz https://github.com/google/oss-fuzz http://blog.topsec.com.cn/ad_lab/alphafuzzer/ http://llvm.org/docs/LibFuzzer.html 子域名枚举扫描器或爆破工具 https://github.com/n4xh4ck5/N4xD0rk (利用搜索引擎来搜集子域名,可以使用西班牙语搜集) https://github.com/jonluca/Anubis https://github.com/lijiejie/subDomainsBrute (lijiejie开发的一款使用广泛的子域名爆破枚举工具) https://github.com/ring04h/wydomain (猪猪侠开发的一款域名收集全面、精准的子域名枚举工具) https://github.com/le4f/dnsmaper (子域名枚举爆破工具以及地图位置标记) https://github.com/0xbug/orangescan (提供web界面的在线子域名信息收集工具) https://github.com/TheRook/subbrute (高效精准的子域名爆破工具,同时也是扫描器中最常用的子域名API库) https://github.com/We5ter/GSDF (基于谷歌SSL透明证书的子域名查询脚本) https://github.com/mandatoryprogrammer/cloudflare_enum (使用CloudFlare进行子域名枚举的脚本) https://github.com/guelfoweb/knock (Knock子域名获取,可用于查找子域名接管漏洞) https://github.com/exp-db/PythonPool/tree/master/Tools/DomainSeeker (多方式收集目标子域名信息) https://github.com/code-scan/BroDomain (兄弟域名查询) https://github.com/chuhades/dnsbrute (高效的子域名爆破工具) https://github.com/yanxiu0614/subdomain3 (一款高效的子域名爆破工具) https://github.com/michenriksen/aquatone (子域名枚举、探测工具。可用于子域名接管漏洞探测) https://github.com/evilsocket/dnssearch (一款子域名爆破工具) https://github.com/reconned/domained (可用于子域名收集的一款工具) https://github.com/bit4woo/Teemo (域名收集及枚举工具) https://github.com/laramies/theHarvester ( https://github.com/swisskyrepo/Subdomino (子域名枚举,端口扫描,服务存活确认) https://github.com/nmalcolm/Inventus (通过爬虫实现的子域名收集工具) https://github.com/aboul3la/Sublist3r (快速子域枚举工具) 数据库类漏洞扫描器或爆破工具 https://github.com/0xbug/SQLiScanner (一款基于SQLMAP和Charles的被动SQL注入漏洞扫描工具) https://github.com/sqlmapproject/sqlmap (注入工具之王sqlmap) https://github.com/stamparm/DSSS (99行代码实现的sql注入漏洞扫描器) https://github.com/LoRexxar/Feigong (针对各种情况自由变化的MySQL注入脚本) https://github.com/youngyangyang04/NoSQLAttack (一款针对mongoDB的攻击工具) https://github.com/Neohapsis/bbqsql (SQL盲注利用框架) https://github.com/NetSPI/PowerUpSQL (攻击SQLSERVER的Powershell脚本框架) https://github.com/WhitewidowScanner/whitewidow (一款数据库扫描器) https://github.com/stampery/mongoaudit (MongoDB审计及渗透工具) https://github.com/torque59/Nosql-Exploitation-Framework (NoSQL扫描/爆破工具) https://github.com/missDronio/blindy (MySQL盲注爆破工具) https://github.com/fengxuangit/Fox-scan (基于SQLMAP的主动和被动资源发现的漏洞扫描工具) https://github.com/NetSPI/PowerUpSQL (用于SQL Server审计的powershell脚本) https://github.com/JohnTroony/Blisqy (用于- http header中的时间盲注爆破工具,仅针对MySQL/MariaDB) https://github.com/ron190/jsql-injection (Java 编写的SQL注入工具) https://github.com/Hadesy2k/sqliv (基于搜索引擎的批量SQL注入漏洞扫描器) https://github.com/UltimateHackers/sqlmate (在sqlmap基础上增加了目录扫描、hash爆破等功能) 弱口令/弱用户名扫描器或爆破工具 https://github.com/lijiejie/htpwdScan (一个简单的- http暴力破解、撞库攻击脚本) https://github.com/ysrc/F-Scrack (对各类服务进行弱口令检测的脚本) https://github.com/Mebus/cupp (根据用户习惯生成弱口令探测字典脚本) https://github.com/netxfly/crack_ssh (Go写的协程版的ssh\redis\mongodb弱口令破解工具) https://github.com/LandGrey/pydictor (暴力破解字典建立工具) https://github.com/shengqi158/weak_password_detect (多线程探测弱口令) https://github.com/UltimateHackers/Blazy (支持测试 CSRF, Clickjacking, Cloudflare and WAF的弱口令探测器) 物联网设备识别工具或扫描器 https://github.com/reverse-shell/routersploit (路由器漏洞利用框架) https://github.com/jh00nbr/Routerhunter-2.0 (路由器漏洞扫描利用) https://github.com/RUB-NDS/PRET (打印机攻击框架) https://github.com/rapid7/IoTSeeker (物联网设备默认密码扫描检测工具) https://github.com/shodan-labs/iotdb (使用nmap扫描IoT设备) https://github.com/googleinurl/RouterHunterBR (路由器设备漏洞扫描利用) https://github.com/scu-igroup/telnet-scanner (Telnet服务密码撞库) 反射型或DOM-Based XSS扫描器 https://github.com/shawarkhanethicalhacker/BruteXSS (一款XSS扫描器,可暴力注入参数) https://github.com/1N3/XSSTracer (小型XSS扫描器,也可检测CRLF、XSS、点击劫持的) https://github.com/0x584A/fuzzXssPHP (PHP版本的反射型xss扫描) https://github.com/chuhades/xss_scan (批量扫描XSS的python脚本) https://github.com/BlackHole1/autoFindXssAndCsrf (自动化检测页面是否存在XSS和CSRF漏洞的浏览器插件) https://github.com/shogunlab/shuriken (使用命令行进行XSS批量检测) https://github.com/UltimateHackers/XSStrike (可识别并绕过WAF的XSS扫描工具) https://github.com/stamparm/DSXS (支持GET、POST方式的高效XSS扫描器) 企业资产管理或信息泄露搜集工具 https://github.com/ysrc/xunfeng (网络资产识别引擎,漏洞检测引擎) https://github.com/laramies/theHarvester (企业被搜索引擎收录敏感资产信息监控脚本:员工 https://github.com/x0day/Multisearch-v2 (Bing、google、360、zoomeye等搜索引擎聚合搜索,可用于发现企业被搜索引擎收录的敏感资产信息) https://github.com/Ekultek/Zeus-Scanner (集成化的综合搜索引擎,能够抓取被搜索引擎隐藏的url,并交由sqlmap、nmap扫描) https://github.com/0xbug/Biu-framework (企业内网基础服务安全扫描框架) https://github.com/metac0rtex/GitHarvester (github Repo信息搜集工具) https://github.com/shengqi158/svnhack (.svn文件夹泄漏利用工具) https://github.com/repoog/GitPrey (GitHub敏感信息扫描工具) https://github.com/0xbug/Hawkeye (企业资产、敏感信息GitHub泄露监控系统) https://github.com/lianfeng30/githubscan (根据企业关键词进行项目检索以及相应敏感文件和文件内容扫描的工具) https://github.com/UnkL4b/GitMiner (github敏感信息搜索工具) https://github.com/lijiejie/GitHack (.git文件夹泄漏利用工具) https://github.com/dxa4481/truffleHog (GitHub敏感信息扫描工具,包括检测commit等) https://github.com/sowish/LNScan (详细的内部网络信息扫描器) https://github.com/SkyLined/LocalNetworkScanner (javascript实现的本地网络扫描器) https://github.com/x0day/Multisearch-v2 (搜索引擎聚合搜索,可用于发现企业被搜索引擎收录的敏感资产信息) webshell检测或病毒分析工具 https://github.com/ym2011/ScanBackdoor (一款简洁的Webshell扫描工具) https://github.com/yassineaddi/BackdoorMan (可对指定目录进行php webshell检测) https://github.com/he1m4n6a/findWebshell (一款简单的webshell检测工具) https://github.com/Tencent/HaboMalHunter (哈勃分析系统,linux系统病毒分析及安全检测) https://github.com/PlagueScanner/PlagueScanner (使用python实现的集成ClamAV、ESET、Bitdefender的反病毒引擎) https://github.com/nbs-system/php-malware-finder (一款高效率PHP-webshell扫描工具) https://github.com/emposha/PHP-Shell-Detector/ (测试效率高达99%的webshell检测工具) https://github.com/erevus-cn/scan_webshell (一款简洁的Webshell扫描工具) https://github.com/emposha/Shell-Detector (Webshell扫描工具,支持php/perl/asp/aspx webshell扫描) https://github.com/m4rco-/dorothy2 (一款木马、僵尸网络分析框架) 内网渗透或扫描工具 https://github.com/0xwindows/VulScritp (企业内网渗透脚本,包括banner扫描、端口扫描;phpmyadmin、jenkins等通用漏洞利用等) https://github.com/lcatro/network_backdoor_scanner (基于网络流量的内网探测框架) https://github.com/fdiskyou/hunter (调用 Windows API 枚举用户登录信息) https://github.com/BlackHole1/WebRtcXSS (自动化利用XSS入侵内网) https://github.com/0xwindows/VulScritp (企业内网渗透脚本,包括banner扫描、端口扫描;各种通用漏洞利用等) https://github.com/fdiskyou/hunter (调用 Windows API 枚举用户登录信息) https://github.com/AlessandroZ/LaZagne (本机密码查看提取工具) https://github.com/huntergregal/mimipenguin (linux密码抓取神器) 中间件扫描器或识别工具 https://nmap.org/download.html (Nmap端口扫描器之王,- https://svn.nmap.org/) https://github.com/ring04h/wyportmap (目标端口扫描+系统服务指纹识别) https://github.com/ring04h/weakfilescan (动态多线程敏感信息泄露检测工具) https://github.com/EnableSecurity/wafw00f (WAF产品指纹识别) https://github.com/rbsec/sslscan (ssl类型识别) https://github.com/urbanadventurer/whatweb (web指纹识别) https://github.com/tanjiti/FingerPrint (web应用指纹识别) https://github.com/nanshihui/Scan-T (网络爬虫式指纹识别) https://github.com/OffensivePython/Nscan (a fast Network scanner inspired by Masscan and Zmap) https://github.com/ywolf/F-NAScan (网络资产信息扫描, ICMP存活探测,端口扫描,端口指纹服务识别) https://github.com/ywolf/F-MiddlewareScan (中间件扫描) https://github.com/maurosoria/dirsearch (Web path scanner) https://github.com/x0day/bannerscan (C段Banner与路径扫描) https://github.com/RASSec/RASscan (端口服务扫描) https://github.com/3xp10it/bypass_waf (waf自动暴破) https://github.com/3xp10it/xcdn (尝试找出cdn背后的真实ip) https://github.com/Xyntax/BingC (基于Bing搜索引擎的C段/旁站查询,多线程,支持API) https://github.com/Xyntax/DirBrute (多线程WEB目录爆破工具) https://github.com/zer0h/- httpscan (一个爬虫式的网段Web主机发现小工具) https://github.com/lietdai/doom (thorn上实现的分布式任务分发的ip端口漏洞扫描器) https://github.com/chichou/grab.js (类似 zgrab 的快速 TCP 指纹抓取解析工具,支持更多协议) https://github.com/Nitr4x/whichCDN (CDN识别、检测) https://github.com/secfree/bcrpscan (基于爬虫的web路径扫描器) https://github.com/ring04h/wyportmap (目标端口扫描+系统服务指纹识别) https://github.com/rbsec/sslscan (SSL类型识别) https://github.com/urbanadventurer/whatweb (Web指纹识别) https://github.com/tanjiti/FingerPrint (Web应用指纹识别) https://github.com/OffensivePython/Nscan (基于Masscan和Zmap的网络扫描器) https://github.com/maurosoria/dirsearch (web路径收集与扫描) https://github.com/3xp10it/xcdn (尝试找出cdn背后的真实ip) https://github.com/lietdai/doom (Thorn上实现的分布式任务分发的ip端口漏洞扫描器) https://github.com/mozilla/ssh_scan (服务器ssh配置信息扫描) https://github.com/18F/domain-scan (针对域名及其子域名的资产数据检测/扫描,包括- http/- https检测等) https://github.com/ggusoft/inforfinder (域名资产收集及指纹识别工具) https://github.com/boy-hack/gwhatweb (CMS识别 python gevent实现) https://github.com/Mosuan/FileScan (敏感文件扫描 / 二次判断降低误报率 / 扫描内容规则化 / 多目录扫描) https://github.com/Xyntax/FileSensor (基于爬虫的动态敏感文件探测工具) https://github.com/deibit/cansina (web路径扫描工具) https://github.com/0xbug/Howl (网络设备 web 服务指纹扫描与检索) https://github.com/mozilla/cipherscan (目标主机服务ssl类型识别) https://github.com/xmendez/wfuzz (Web应用fuzz工具、框架,同时可用于web路径/服务扫描) https://github.com/UltimateHackers/Breacher (多线程的后台路径扫描器,也可用于发现Execution After Redirect漏洞) https://github.com/ztgrace/changeme (弱口令扫描器,不仅支持普通登录页,也支持ssh、mongodb等组件) https://github.com/medbenali/CyberScan (渗透测试辅助工具,支持分析数据包、解码、端口扫描、IP地址分析等) https://github.com/m0nad/HellRaiser (基于nmap的扫描器,与cve漏洞关联) https://github.com/scipag/vulscan (基于nmap的高级漏洞扫描器,命令行环境使用) https://github.com/jekyc/wig (web应用信息搜集工具) https://github.com/eldraco/domain_analyzer (围绕web服务的域名进行信息收集和"域传送"等漏洞扫描,也支持针对背后的服务器端口扫描等) https://github.com/cloudtracer/paskto (基于Nikto扫描规则的被动式路径扫描以及信息爬虫) https://github.com/zerokeeper/WebEye (快速识别WEB服务器类型、CMS类型、WAF类型、WHOIS信息、以及语言框架) https://github.com/m3liot/shcheck (用于检查web服务的- http header的安全性) https://github.com/aipengjie/sensitivefilescan (一款高效快捷的敏感文件扫描工具) https://github.com/fnk0c/cangibrina (通过字典穷举、google、robots.txt等途径的跨平台后台管理路径扫描器) https://github.com/n4xh4ck5/CMSsc4n (CMS指纹识别) 专用(即特定性针对某些组件)扫描器 https://github.com/brianwrf/hackUtils (java反序列化利用工具集) https://github.com/frohoff/ysoserial ( java反序列化利用工具) https://github.com/blackye/Jenkins (Jenkins漏洞探测、用户抓取爆破) https://github.com/code-scan/dzscan (discuz漏洞扫描) https://github.com/chuhades/CMS-Exploit-Framework (CMS攻击框架) https://github.com/lijiejie/IIS_shortname_Scanner (IIS短文件名漏洞扫描) https://github.com/riusksk/FlashScanner (flashxss扫描) https://github.com/coffeehb/SSTIF (服务器端模板注入漏洞的半自动化工具) https://github.com/epinna/tplmap (服务器端模板注入漏洞检测与利用工具) https://github.com/cr0hn/dockerscan (docker扫描工具) https://github.com/GoSecure/break-fast-serial (借助DNS解析来检测Java反序列化漏洞工具) https://github.com/dirtycow/dirtycow.github.io (脏牛提权漏洞exp) https://github.com/code-scan/dzscan (首款集成化的Discuz扫描工具) https://github.com/chuhades/CMS-Exploit-Framework (一款简洁优雅的CMS扫描利用框架) https://github.com/lijiejie/IIS_shortname_Scanner (IIS短文件名暴力枚举漏洞利用工具) https://github.com/coffeehb/SSTIF (一个Fuzzing服务器端模板注入漏洞的半自动化工具) https://github.com/cr0hn/dockerscan (Docker扫描工具) https://github.com/m4ll0k/WPSeku (一款精简的wordpress扫描工具) https://github.com/rastating/wordpress-exploit-framework (集成化wordpress漏洞利用框架) https://github.com/ilmila/J2EEScan (用于扫描J2EE应用的一款burpsuite插件) https://github.com/riusksk/StrutScan (一款基于perl的strut2的历史漏洞扫描器) https://github.com/D35m0nd142/LFISuite (本地文件包含漏洞利用及扫描工具,支持反弹shell) https://github.com/0x4D31/salt-scanner (基于Salt Open以及Vulners Linux Audit API的linux漏洞扫描器,支持与JIRA、slack平台结合使用) https://github.com/tijme/angularjs-csti-scanner (自动化探测客户端AngularJS模板注入漏洞工具) https://github.com/irsdl/IIS-ShortName-Scanner (Java编写的IIS短文件名暴力枚举漏洞利用工具) https://github.com/swisskyrepo/Wordpresscan (基于WPScan以及WPSeku的优化版wordpress扫描器) https://github.com/CHYbeta/cmsPoc (CMS渗透测试框架) https://github.com/rudSarkar/crlf-injector (CRLF注入漏洞批量扫描) https://github.com/3gstudent/Smbtouch-Scanner (自动化扫描内网中存在的由shadow brokers泄露的ETERNAL系列漏洞) https://github.com/utiso/dorkbot (通过定制化的谷歌搜索引擎进行漏洞页面搜寻及扫描) https://github.com/OsandaMalith/LFiFreak (本地文件包含漏洞利用及扫描工具,支持反弹shell) https://github.com/mak-/parameth (用于枚举脚本的GET/POST未知参数字段) https://github.com/Lucifer1993/struts-scan (struts2漏洞全版本检测和利用工具) https://github.com/hahwul/a2sv (SSL漏洞扫描,例如心脏滴血漏洞等) https://github.com/NullArray/DorkNet (基于搜索引擎的漏洞网页搜寻) https://github.com/NickstaDB/BaRMIe (用于攻击爆破Java Remote Method Invocation服务的工具) https://github.com/RetireJS/grunt-retire (扫描js扩展库的常见漏洞) https://github.com/kotobukki/BDA (针对hadoop/spark等大数据平台的的漏洞探测工具) https://github.com/jagracey/Regex-DoS (RegEx 拒绝服务扫描器) https://github.com/milesrichardson/docker-onion-nmap (使用nmap扫描Tor网络上隐藏的"onion"服务) https://github.com/Moham3dRiahi/XAttacker (Web CMS Exploit 工具,包含针对主流 CMS 的 66 个不同的 Exploits) https://github.com/lijiejie/BBScan (一个迷你的信息泄漏批量扫描脚本) 无线网络(审计)扫描器 https://github.com/savio-code/fern-wifi-cracker/ (无线安全审计工具) https://github.com/m4n3dw0lf/PytheM (Python网络/渗透测试工具) https://github.com/P0cL4bs/WiFi-Pumpkin (无线安全渗透测试套件) https://github.com/MisterBianco/BoopSuite (无线网络审计工具,支持2-5GHZ频段) https://github.com/DanMcInerney/LANs.py (ARP欺骗,无线网络劫持) https://github.com/besimaltnok/PiFinger (检查wifi是否是"大菠萝"所开放的热点,并给予网络评分) https://github.com/derv82/wifite2 (自动化无线网络攻击工具wifite的重构版本) 局域网络(本地网络)扫描器 https://github.com/sowish/LNScan (基于BBScan via.lijiejie的本地网络扫描) https://github.com/niloofarkheirkhah/nili (网络扫描,中间人攻击,协议检测与逆向) https://github.com/SkyLined/LocalNetworkScanner (基于javascript的本地网络扫描) 代码审计工具或扫描器 https://github.com/wufeifei/cobra (白盒代码安全审计系统) https://github.com/OneSourceCat/phpvulhunter (静态php代码审计) https://github.com/Qihoo360/phptrace (跟踪、分析PHP运行情况的工具) https://github.com/ajinabraham/NodeJsScan (NodeJS应用代码审计) https://github.com/shengqi158/pyvulhunter (Python应用审计) https://github.com/presidentbeef/brakeman ( Ruby on ... 综合来看,fuzzdb-collect在同类工具中还是有一定优势的,特别是在功能完整性和易用性方面表现不错。如果你有相关需求,可以下载试试。 {card-default label="📦 工具信息"} 🔧 工具名称:fuzzdb-collect 👤 开发作者:euphratica 📝 工具描述:网络上安全资源的搜集 💻 开发语言:Python 📜 开源协议:未知开源协议 ⭐ Star数:2 | 🍴 Fork数:1 📅 更新时间:2026年08月06日 {/card-default} 本文介绍的工具来源于Gitee开源社区,仅供学习交流使用,请遵守原项目开源协议。
-
运维安全必备:subfinder 工具解析 推荐一个实用的开源工具——subfinder。项目由projectdiscovery开发维护,GitHub上获得了 14394 个Star。简单来说,它是一款快速被动子域枚举工具。,对于站长和开发者来说是个不错的工具。 工具功能介绍 Fast passive subdomain enumeration tool. Features • Install • Usage • API Setup • Library • Join Discord ---subfinder is a subdomain discovery tool that returns valid subdomains for websites, using passive online sources. It has a simple, modular architecture and is optimized for speed. subfinder is built for doing one thing only - passive subdomain enumeration, and it does that very well.We have made it to comply with all the used passive source licenses and usage restrictions. The passive model guarantees speed and stealthiness that can be leveraged by both penetration testers and bug bounty hunters alike. Fast and powerful resolution and wildcard elimination modules Curated passive sources to maximize results Multiple output formats supported (JSON, file, stdout) Optimized for speed and lightweight on resources STDIN/OUT support enables easy integration into workflows Usage sh subfinder -h This will display help for the tool. Here are all the switches it supports. yaml Usage: ./subfinder [flags]Flags: INPUT: -d, -domain string[] domains to find subdomains for -dL, -list string file containing list of domains for subdomain discoverySOURCE: -s, -sources string[] specific sources to use for discovery (-s crtsh,github). Use -ls to display all available sources. -recursive use only sources that can handle subdomains recursively (e.g. subdomain.domain.tld vs domain.tld) -all use all sources for enumeration (slow) -es, -exclude-sources string[] sources to exclude from enumeration (-es alienvault,zoomeyeapi)FILTER: -m, -match string[] subdomain or list of subdomain to match (file or comma separated) -f, -filter string[] subdomain or list of subdomain to filter (file or comma separated)RATE-LIMIT: -rl, -rate-limit int maximum number of http requests to send per second -rls value maximum number of http requests to send per second for providers in key=value format (-rls "hackertarget=10/s,shodan=15/s") -t int number of concurrent goroutines for resolving (-active only) (default 10)UPDATE: -up, -update update subfinder to latest version -duc, -disable-update-check disable automatic subfinder update checkOUTPUT: -o, -output string file to write output to -oJ, -json write output in JSONL(ines) format -oD, -output-dir string directory to write output (-dL only) -cs, -collect-sources include all sources in the output (-json only) -oI, -ip include host IP in output (-active only)CONFIGURATION: -config string flag config file (default "$CONFIG/subfinder/config.yaml") -pc, -provider-config string provider config file (default "$CONFIG/subfinder/provider-config.yaml") -r string[] comma separated list of resolvers to use -rL, -rlist string file containing list of resolvers to use -nW, -active display active subdomains only -proxy string http proxy to use with subfinder -ei, -exclude-ip exclude IPs from the list of domains -mr, -max-results int limit the number of results per source (0 = unlimited; honored by paginating sources)DEBUG: -silent show only subdomains in output -version show version of subfinder -v show verbose output -nc, -no-color disable color in output -ls, -list-sources list all available sources (-oJ for JSON)OPTIMIZATION: -timeout int seconds to wait before timing out (default 30) -max-time int minutes to wait for enumeration results (default 10) -rsr, -response-size-read int max response body size to read in bytes from passive sources (0 = unlimited) Environment VariablesSubfinder supports environment variables to specify custom paths for configuration files:- SUBFINDER_CONFIG - Path to config.yaml file (overrides default $CONFIG/subfinder/config.yaml) SUBFINDER_PROVIDER_CONFIG - Path to provider-config.yaml file (overrides default $CONFIG/subfinder/provider-config.yaml) Installationsubfinder requires go1.24 to install successfully. Run the following command to install the latest version: sh go install -v github.com/projectdiscovery/subfinder/v2/cmd/subfinder@latest Learn about more ways to install subfinder here: https://docs.projectdiscovery.io/tools/subfinder/install. Post Installation Instructionssubfinder can be used right after the installation, however many sources required API keys to work. Learn more here: https://docs.projectdiscovery.io/tools/subfinder/install#post-install-configuration. Running SubfinderLearn about how to run Subfinder here: https://docs.projectdiscovery.io/tools/subfinder/running. Subfinder Go librarySubfinder can also be used as library and a minimal examples of using subfinder SDK is available here Resources- Recon with Me !!! Licensesubfinder is made with 🖤 by the projectdiscovery team. Community contributions have made the project what it is. See the THANKS.md file for more details.Read the usage disclaimer at DISCLAIMER.md and contact us for any API removal. {card-default label="📦 工具信息"} 🔗 项目地址:https://github.com/projectdiscovery/subfinder ⭐ Star数:14394 💻 开发语言:Go 📝 项目描述:快速被动子域枚举工具。 {/card-default} 总的来说,subfinder是一个功能比较实用的开源工具,适合日常工作和学习使用。如果你正在寻找一款相关工具,不妨下载试试。使用前建议仔细阅读项目文档。 本文介绍的工具来源于GitHub开源社区,仅供学习交流使用,请遵守原项目开源协议。
-
hashcat - 渗透测试人员必备工具 推荐一个实用的开源工具——hashcat。项目由hashcat开发维护,GitHub上获得了 26717 个Star。简单来说,它是一款全球最快、最先进的密码恢复实用程序,对于站长和开发者来说是个不错的工具。 工具功能介绍 hashcat is a highly optimized password recovery platform for GPUs, CPUs, and large distributed systems. Features ###* World's fastest password cracker World's first and only in-kernel rule engine Free and open source, under the MIT license Multi-OS: Linux, Windows and macOS Multi-backend: CUDA, HIP, Metal and OpenCL Multi-device: several devices, and mixed device types, in one system Multi-hash: cracks large numbers of hashes at once Over 590 hash modes, each written with performance in mind 5 attack modes: wordlist, brute-force, PCFG, hybrid and association Assimilation bridge: add a hash mode in C, Python or Rust, without writing a kernel Brain: skips candidates an earlier session already tried Distributed cracking networks, using an overlay Reads candidates from a wordlist, from stdin, or from another program Markov chain keyspace ordering, so the likely candidates come first Automatic performance tuning per device Interactive pause and resume Named sessions, and restore after an interruption Built-in benchmark Integrated thermal watchdog Hex salt and hex charset, for hashes and character sets that are not text Encrypted plains: crack a hash for someone else without being able to read the password Keyboard layout mapping, for full disk encryption passwords typed on a non-US keyboard License ###hashcat is licensed under the MIT license. See docs/license.txt. Installation ###Download the latest release and unpack it where you want it. Use 7z x when unpacking from the command line, so the full file paths stay intact.Your platform may also provide packages. Building ###Building from source is optional. The release package is the same program, and a binary you build yourself will not crack any faster. Build it if you want a change of your own, a fix that is in master but not yet released, or a platform we do not ship a binary for.See BUILD.md for how.Tests:Build | BSD | Rust Usage and help ###Start with --help, also kept in the tree as docs/hashcat-help.md. One example hash per mode is in docs/hashcat-example-hashes.md.The wiki and the FAQ go further. The forum holds years of answered questions. If you still need help from a real human, come to Discord. Documentation ###The docs directory covers each feature. The ones people ask about most:* Plugin development guide, for adding a hash mode Assimilation bridge, and its Python and Rust quickstarts Generic attack mode and PCFG Brain, slow candidates, encrypted plains Keyboard layout mapping Compression libraries, for reading gzip, xz and zstd files Release notes for v7.1.0, and the full changelog Contributing ###Contributions are welcome. CONTRIBUTING.md has the code style, what a pull request needs, and how to test a change before you send it. Security ###SECURITY.md has how to report a vulnerability, and what counts as one. Happy Cracking! {card-default label="📦 工具信息"} 🔗 项目地址:https://github.com/hashcat/hashcat ⭐ Star数:26717 💻 开发语言:C 📝 项目描述:全球最快、最先进的密码恢复实用程序 {/card-default} 总的来说,hashcat是一个功能比较实用的开源工具,适合日常工作和学习使用。如果你正在寻找一款相关工具,不妨下载试试。使用前建议仔细阅读项目文档。 本文介绍的工具来源于GitHub开源社区,仅供学习交流使用,请遵守原项目开源协议。
-
nmap 功能特性与应用场景 推荐一个实用的开源工具——nmap。项目由nmap开发维护,GitHub上获得了 13532 个Star。简单来说,它是一款Nmap -网络映射器。官方SVN存储库的Github镜像。,对于站长和开发者来说是个不错的工具。 工具功能介绍 Nmap ====Nmap is released under a custom license, which is based on (but not compatible with) GPLv2. The Nmap license allows free usage by end users, and we also offer a commercial license for companies that wish to redistribute Nmap technology with their products. See Nmap Copyright and Licensing for full details.The latest version of this software as well as binary installers for Windows, macOS, and Linux (RPM) are available from Nmap.orgFull documentation is also available on the Nmap.org website.Questions and suggestions may be sent to the Nmap-dev mailing list.Installing Ideally, you should be able to just type:./configure make make installFor far more in-depth compilation, installation, and removal notes, read the Nmap Install Guide on Nmap.org.Using Nmap Nmap has a lot of features, but getting started is as easy as running `nmap scanme.nmap.org. Running nmap` without any parameters will give a helpful list of the most common options, which are discussed in depth in [the man page](https://nmap.org/book/man.html). Users who prefer a graphical interface can use the included Zenmap front-end.Contributing Information about filing bug reports and contributing to the Nmap project can be found in the HACKING and CONTRIBUTING.md files. {card-default label="📦 工具信息"} 🔗 项目地址:https://github.com/nmap/nmap ⭐ Star数:13532 💻 开发语言:C 📝 项目描述:Nmap -网络映射器。官方SVN存储库的Github镜像。 {/card-default} 总的来说,nmap是一个功能比较实用的开源工具,适合日常工作和学习使用。如果你正在寻找一款相关工具,不妨下载试试。使用前建议仔细阅读项目文档。 本文介绍的工具来源于GitHub开源社区,仅供学习交流使用,请遵守原项目开源协议。
-
beef 安装配置与使用指南 推荐一个实用的开源工具——beef。项目由beefproject开发维护,GitHub上获得了 11003 个Star。简单来说,它是一款Browser Exploitation Framework项目,对于站长和开发者来说是个不错的工具。 工具功能介绍 ===============================================================================Copyright (c) 2006-2026 Wade Alcorn - wade@bindshell.net Browser Exploitation Framework (BeEF) - https://beefproject.com See the file 'doc/COPYING' for copying permission===============================================================================What is BeEF? -------------__BeEF__ is short for __The Browser Exploitation Framework__. It is a penetration testing tool that focuses on the web browser.Amid growing concerns about web-borne attacks against clients, including mobile clients, BeEF allows the professional penetration tester to assess the actual security posture of a target environment by using client-side attack vectors. Unlike other security frameworks, BeEF looks past the hardened network perimeter and client system, and examines exploitability within the context of the one open door: the web browser. BeEF will hook one or more web browsers and use them as beachheads for launching directed command modules and further attacks against the system from within the browser context.Get Involved ------------You can get in touch with the BeEF team. Just check out the following:__Please, send us pull requests!____Web:__ https://beefproject.com/__Bugs:__ https://github.com/beefproject/beef/issues__Security Bugs:__ security@beefproject.com__Twitter:__ @beefprojectDiscord: https://discord.gg/25wT2P8pwxRequirements ------------* Operating System: Mac OSX 10.5.0 or higher / modern Linux. Note: Windows is not supported. Ruby: 3.0 or newer SQLite: 3.x Node.js: 10 or newer The gems listed in the Gemfile: https://github.com/beefproject/beef/blob/master/Gemfile Selenium is required on OSX: brew install selenium-server-standalone (See https://github.com/shvets/selenium)Quick Start -----------__The following is for the impatient.__The install script installs the required operating system packages and all the prerequisite Ruby gems: $ ./install For full installation details, please refer to INSTALL.txt or the Installation page on the wiki.Upon successful installation, be sure to read the Configuration page on the wiki for important details on configuring and securing BeEF.Documentation ---* User Guide Frequently Asked Questions JSdocsUsage -----To get started, simply execute beef and follow the instructions: $ ./beef {card-default label="📦 工具信息"} 🔗 项目地址:https://github.com/beefproject/beef ⭐ Star数:11003 💻 开发语言:JavaScript 📝 项目描述:Browser Exploitation Framework项目 {/card-default} 总的来说,beef是一个功能比较实用的开源工具,适合日常工作和学习使用。如果你正在寻找一款相关工具,不妨下载试试。使用前建议仔细阅读项目文档。 本文介绍的工具来源于GitHub开源社区,仅供学习交流使用,请遵守原项目开源协议。